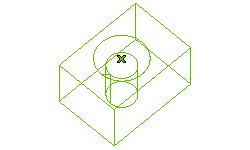
For the purpose of the tutorial create a rectangular block of size 100*50*50 and follow the steps given below to create the counterbored hole, as shown in the image below.

A countersunk hole has two diameters, but the transition between the bigger diameter and the smaller diameter is in the form of a tapered cone. In this hole type, you need to define the countersunk diameter, hole diameter, depth of the hole, and the countersunk angle.
For the purpose of the tutorial create a rectangular block of size 100*50*50 and follow the steps given below to create the counterbored hole, as shown in the image below.

 or
or  to confirm your selections and create the countersunk hole. Click
  to discard your changes
| Note If the model is component you need to select the X-Components check box and the component for the Components selector from the selection list to create a hole. To reselect the components, right-click on Components to select Reset and then select the involved components. You cannot add fillets or chamfers while creating a hole through components. |