| Text | The annotation will consist of plain text. As soon as the point of interest is specified, a dialog box will be displayed to enable you to type in the annotation text. |
| From file | The annotation will consist of an external document. A file load dialog box is displayed enabling you to attach the desired external file to the annotation. In the Files of type drop-down list you can select the type of file to be used (for instance, a Microsoft® Excel or Microsoft® Word file might be selected).
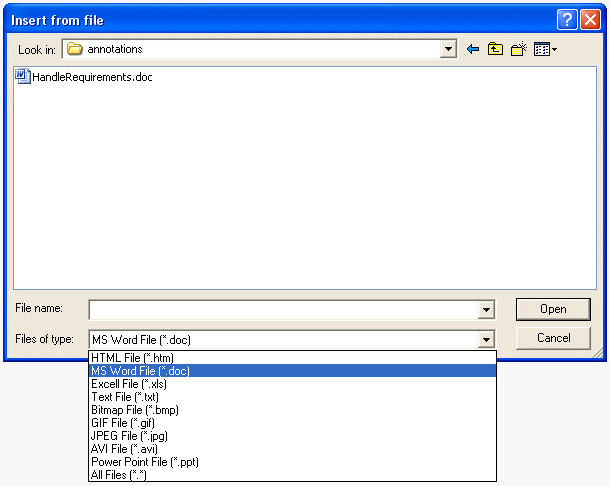 When the note is expanded, a dialog box will display the referenced document. |
| From Internet | The annotation will consist of a URL to be opened and viewed in the expanded annotation. Upon expanding the annotation, a web browser will appear in the expanded annotations frame and will load the page or document identified by the URL address, enabling you to open a web page from an annotation (which can be very useful: suppose a companys ISO documents were contained in a Company intranet. This annotation would allow the engineer to quickly view the relevant ISO document with the annotation). The URL browser Insert from Internet dialog box is provided to enter the desired URL string. 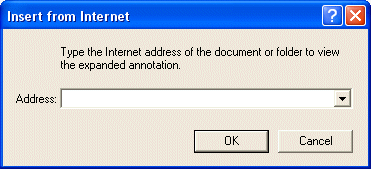 The Address box is also a drop-down list containing all of the URLs most recently typed into this dialog, so that reusing URLs is very simple. |
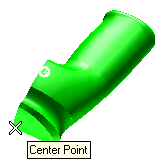
| Snap point | A special point such as a vertex, a datum point, a point on an edge, or the center or mid-point of an edge. | 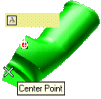 |
| Point on face | A point on a face of a solid. | 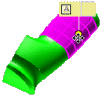 |
- A special point, if you selected Snap point, as in the following illustration
To change the selected point, right-click on Point, select Reset in the context menu and specify another point.
- A face of a solid, if you selected Point on face
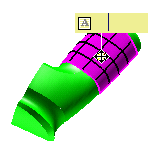
The point used to select the face is automatically selected as the point of interest. To change the point, right-click on Point, select Reset in the context menu and specify another point. To change also the face, right-click on Face, select Reset in the context menu and specify another face.
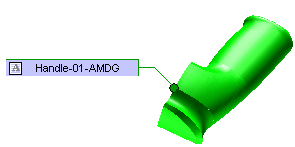
- If the annotation you have selected is of the From File or From Internet type, the annotation label shows up as soon as the point of interest is selected.

The default label is the name of the selected file. Change it as you like.
- If the annotation you have selected is of the Text type, a dialog box is displayed. Type in the annotation text. The first line will be used as the annotation label. To move from one line to another, use the ENTER key.

Double-click on an empty zone in the Graphics Area to confirm and create the annotation.
 or
or  to confirm your selections and create the Annotation.
Click
 to discard your changes.