 Remove All Filters
The Open command enables you to access the contents of the selected catalog and eventually insert a part in your model.
This command is located in the context menu available when right-clicking on a catalog of components; the opening of a catalog is also executed automatically by other commands such as Replace Standard Part.
Upon execution, the command opens the query view dialog defined for the relevant catalog of thinkparts. In this dialog you will find the tools to manage the catalog parts and insert them in the model:
A series of buttons in the top horizontal section just below the title bar enable you to access the thinkparts query view control functions:
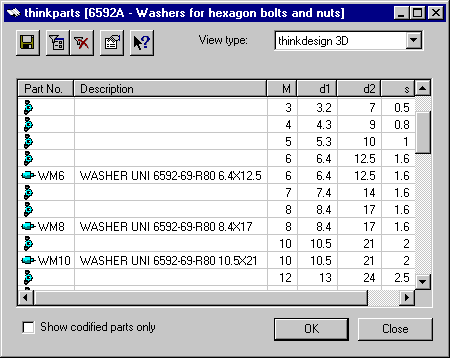
In the top right part of the dialog box, provided that a think3 model or drawing is open, a pull-down menu enables you to choose the View type: of the part to be imported.
By right-clicking on the items listed in the query, you access a series of commands in the context menus that enable you to:
The Show codified parts only checkbox limits the listed items to those to which a part number (Part No.) has been assigned, while the uncoded elements will be hidden.
After selecting one of the lines in the grid, you are enabled quickly auto-dimension all columns by pressing CTRL and +.
Click OK to import the selected part as component in your model, or Cancel to close the dialog with no further action.
If you are working in the 3D environment, be aware that the imported part is inserted in the current assembly in two ways, depending on the type of 3D representation in use: as a local component or as an X-Reference. In this case, the external file is stored in the folder specified by the Catalog X-Ref. folder field in the thinkparts category of the thinkPLM options.