
thinkparts comes with a built-in sample series of catalogs. In this example we will see the step by step procedure to position a washer and a screw in a flange hole.
Prerequisite to this procedure is the availability of a think3 application licence and the installation of the thinkparts catalog browser. A model (a flange in our example) must be open in the think3 application; the model has a 10mm hole for mounting the screw and washer.
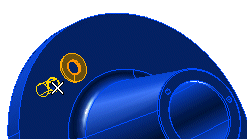
| 1 | Start the thinkparts Catalog Browser command and navigate to the sample washers catalog. |
| 2 | Open the catalog and select the M10 washer available. If you have assigned part numbers to your washers, you may have more than one listed; choose a suitable one. |
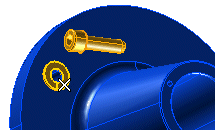
| 3 | Click OK or double-click the washer or select Import from the context menu. You may have to close the thinkparts query view or move it out of the way to continue. |
| 4 | You are prompted to enter the new position: specify a point in the model window where you wish to add the washer. |
| 5 | You are prompted to select the shoulder: select the surface where the washer should be positioned.
|
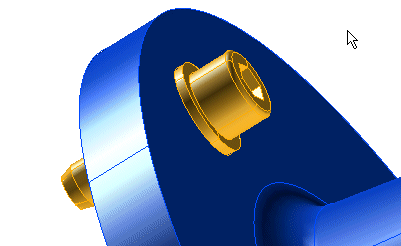
| 6 | You are prompted to select the hole: select the hole where the washer should be positioned and the washer moves into place.
|
| 7 | Open the screws catalog and import a suitable length M10 screw. |
| 8 | You are prompted to enter the new position: specify a point in the model window where you wish to add the screw, probably next to the washer just inserted. |
| 9 | You are prompted to select the shoulder: select the top surface of the washer, on the side where the screw's head will rest.
|
| 10 | You are prompted to select the hole: select the hole of the washer and the screw moves into place.
|