| 1 |
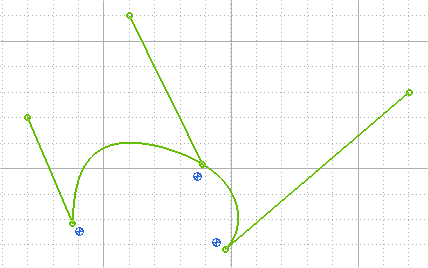
In the profile mode create 3 lines in any random order. Do not pre-select any line. Also create a spline curve using
Insert
 Curve
Control Points.
Curve
Control Points.
|
| 2 |
Start the Point-on-Curve Constraint command —
Insert
Point on Curve.
|
| 3 |
From the selection list of the command, select the sequence to Multiple.
|
| 4 |
Now, click on the spline curve, to select it. Select the
Fix at Parameter option and enter 0 in the mini dialog box.
|
| 5 |
In the selection list another selector —
Point — will appear. Click an end point of a line you have created. We are going to snap this line to the start point of the spline.
Note
Please note that the Fix at Parameter mini-dialog box might hide the point you need to click at. In that case hit the F7 key to temporarily hide the mini-dialog box, perform your selection and hit F7 again to unhide the mini-dialog box (see
Hide Minidialogs for details). |
|
| 6 |
The Point on Curve constraint is now applied. The line is attached to the start point of the spline.
|
| 7 |
Change the value for Fix at Parameter to 1 and select one end point of the second line you have created. We are going to snap this line to the end point of the spline.
|
| 8 |
Change the value for Fix at Parameter to an arbitrary value between 0 and 1. Let it be 0.35.
|
| 9 |
Select one end point of the third line you have created. We are going to snap this line to a point on the spline where its parameter value is equal to 0.35. Note that this will be a "near middle" point on the spline.
|