

Setting Associativity


Once you have started the Advanced GSM command there several areas to be considered:
The Entities drop-down list enables you to select the type of entities to be modified (Solid, Surfaces, Curves, Points). Once you have selected the type (default is Solid) you can select the entities to be modified in the model.
Preserving conditions define what has to be preserved in the modification and how. They can be applied to points, curves, surface contours and hghlight lines (What) and they cover conditions like position, tangency, curvature etc. (How).
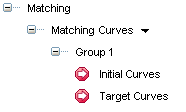
Matching conditions define the modification in terms what is the initial shape and the target one, and how they behave. As above, they can be applied to points, curves, surface contours (What) and they cover conditions like position, tangency, curvature etc (How)
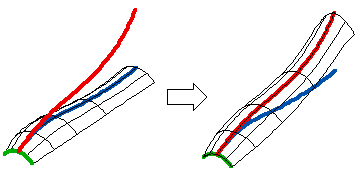
For example, in the following illustration:
Please note that the selection list is dynamically updated while you select entities in the model. Sometimes it can be longer than the graphics area; scrolling arrows are provided to enable you to reach the desired items:
- What to Modify: the surface
- What to Preserve the green boundary, How: keeping position
- What to Match: the blue curve with the red one, How: target position
,
.If you hold down the SHIFT key when clicking the arrows, you will scroll five items at a time instead of just one.
| Suggestion about selection
In some situations, to make selection easier, it can be useful to select the entities to be modified after the entities to match and/or to preserve. This way, selection is much quicker, as nothing is highlighted in the model. On the contrary, especially in complex models, if you first select the entities to be modified, recognizing and selecting the entities to match and/or to preserve among a number of highlighted entities might not be as easy. |
Read the Introductory examples on GSM to learn more.
4 — Which entities the shape must be Through and How
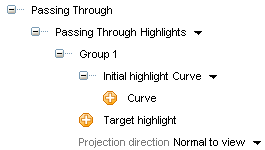
A most useful set of powerful constraints is available under the Passing Through node. They enable you to apply a controlled modification to a shape so as to make it pass through some specified points, curves and surface boundaries or even highlight lines (What). Conditions covered are position, tangency, curvature etc. (How). See "Modifying a shape so as to constrain it to be through some other entities" for details.
5 — Which target shape has to be matched
You are enabled you to specify shape constraints on curves and points. To apply these constraints, you can select Curves or Points in the Target Shape drop-down list under the Target Shape node.
Using these options you can apply a controlled modification to a shape (using its boundary curves or points) so as to match target shape conditions that can be a line, plane, sphere, cylinder etc. See the "Shape Constraints" document for details.
The Associative Mode check box affects solids and surfaces.
When the command is applied to surfaces:When the command is applied to solids:
- If the Associtive Mode check box is selected, the result you will obtain is a solid, which will retain an associativity link to its base entities, so that if you modify such entities the solid will be updated accordingly.
- If the Associative Mode check box is not selected, the result you will obtain is a set of curves/surfaces of the "GSM" type which describe the new shape. A set of special options is provided to convert such curves/surfaces into NURBS curves/surfaces, in the case you need to export them to some environment different from think3.
- If the Associative Mode check box is not selected, you can modify only static solids. If you select the Copy check box under More Options, a static copy of the original solid will be created and the changes will be applied to the copy.
- If the Associative Mode box is selected, any type of solid can be modified.
The additional area is displayed when you click More Options
It enables you to:
Copy Apply the changes to a copy of the original entities rather than to the original entities themselves Hide Hide or display the original unmodified surfaces (default is they are hidden) Quality Checks Perform quality checks on results Approximation Obtain NURBS surfaces instead of specialized ones Precision Set the precision values to be achieved Shape Control Set the parameters controlling the shape of the resulting surfaces Symmetry When checked — to select up to three symmetry planes about which the constraints you set will be mirrored for the model you are modifying. When not selected, constraints will not be mirrored.