Creating a Solid by Connecting Multiple Boundary Profiles along a Spine
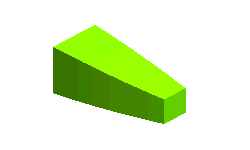
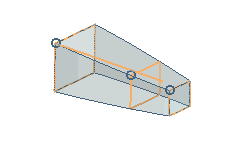
The command enables you to create a solid by sweeping more than two boundary profiles along a spine path by using the Constant axis type Motion Mode, as shown in the image below.
 |
 |
 |
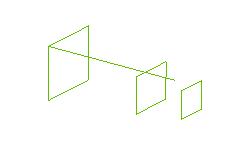
| Profile and drive curve |
|
Generic sweep
|
Note:
In order to create the solid, the two or more than two boundary profiles must not include islands |
To obtain the above result, you need to open the Three_profiles_sweep.e3 file available in the samples folder of your installation folder and follow the steps given below.
- Start the command to display the selection list.
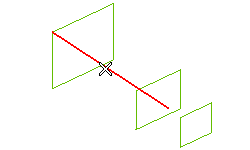
- Next, you will be prompted to select the spine (drive curve) for path transition. Select the drive curve for the Spine selector, as shown in the image below.
- Now, click on the Boundaries selector in the selection list and select the profile you want to sweep from the Graphic Area, as shown in the image below.
- Next, select the Constant axis option from the Motion Mode drop-down list and X from the Direction drop-down list. The preview of the sweep feature gets displayed with warnings, as shown in the image below.
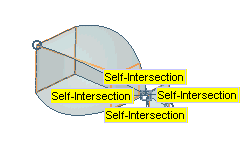
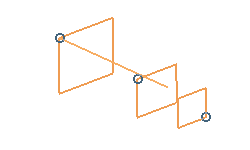
- To reset the starting and closing points for smooth path transition. Right-click on the Start Points to select the Reset option and reselect the points on the feature for smooth propagation. The preview is shown in the image below.
- Click
 or
or  to confirm your selections and create the solid, as shown in the image below.
Click  to discard your changes.
See "Using Spines" for details on how to use spine profiles.
Also try to...