Version 2008.1 introduces the following enhancements to the Options/Properties dialog box.
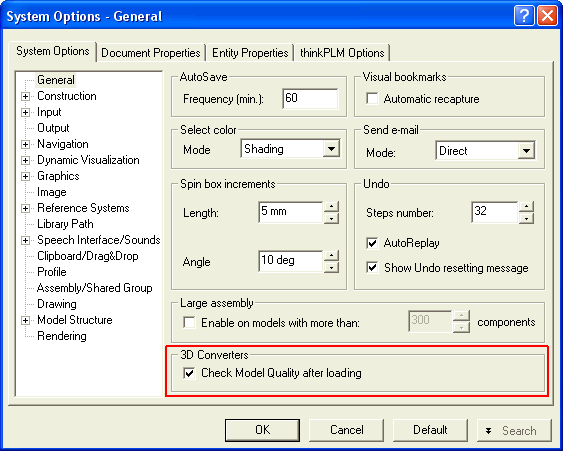
In this version, the new 3D Converters area has been introduced in the General category. The option in this area is used to perform quality checks on the model loaded using the 3D converters. As a result, you can view any topological or geometric defects present in the model.
| Note The quality check is done only for some supported formats; these are STEP, IGES, VDA, Parasolid, CATIA V5 and ProEngineer. |

A new General-Advanced category has been created in this version.
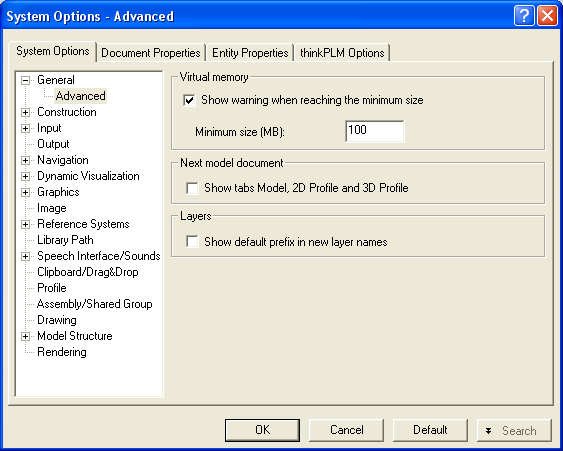
The controls in the Virtual memory area enable you to achieve complete control over the usage of virtual memory by the application. You can activate the display of warning when the remaining free virtual memory reaches a threshold value, which you can freely define in the Minimum size (MB) edit box.
The Show tabs Model, 2D Profile and 3D Profile check box under Next model document enables you to control the visualization of the specific tabs under the Graphics Area for the Model, 2D and 3D profile environment.
The new option Show default prefix in new layer names under Layers in the General-Advanced category of the System Options enables you to add the prefix Layer to the name of the new layer.
The changes take effect only when you open the next document.
The new Set direction/axes using X, Y, Z check box has been introduced in this category.
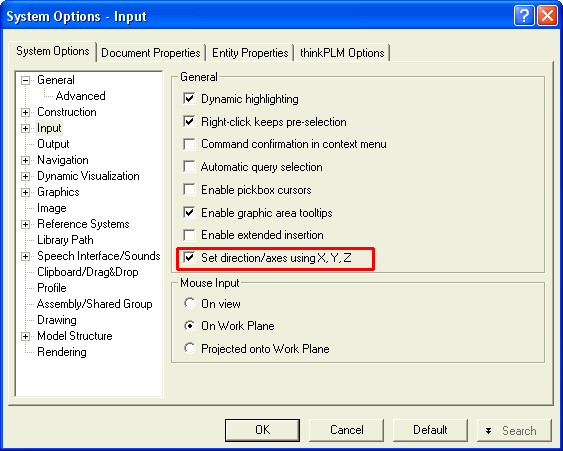
Refer to the Enhancements in the general method for axis, line and direction definition topic for details.
The options in this new category control the display of the Work Plane and the Absolute Reference System (World). Jointly these two systems are called as the Reference Systems.
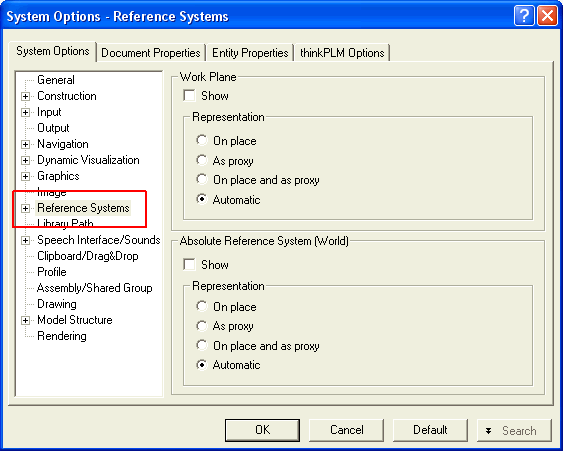
You can define whether to display the Reference System at its actual location or as a dummy (Proxy) at the corner of the Graphics Area. This will be helpful in knowing the orientation of the view when the actual Reference System is beyond the visible portion of the Graphics Area.
The options in this new category control the appearance of the Reference Systems.
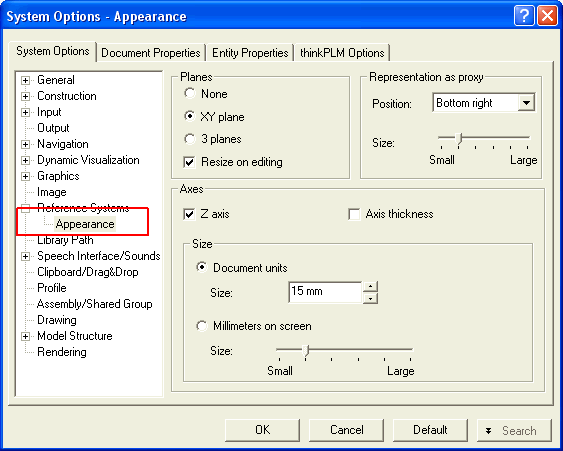
Here you can define the way the Reference System is displayed on the Graphics Area in terms of its size, position and constitution. The options in the Axes area are also applicable to the Profile Reference System.
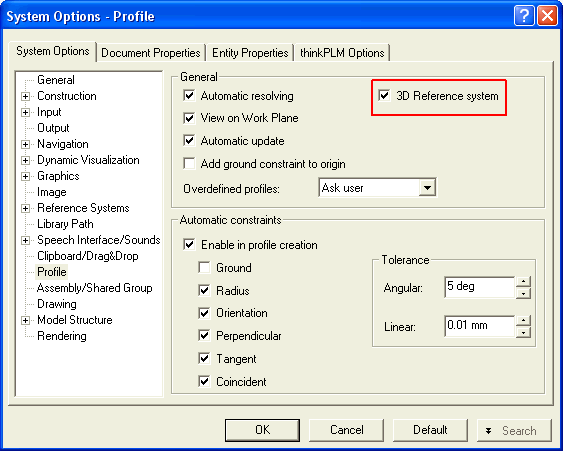
The old Reference System check box has now been replaced with the 3D Reference system check box.
The options in this category controls the display and saving of the rendered images.
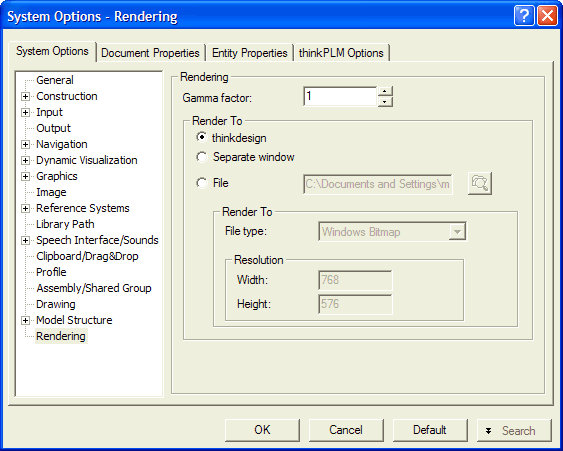
Here you can define where the rendered model is displayed or its image is saved.
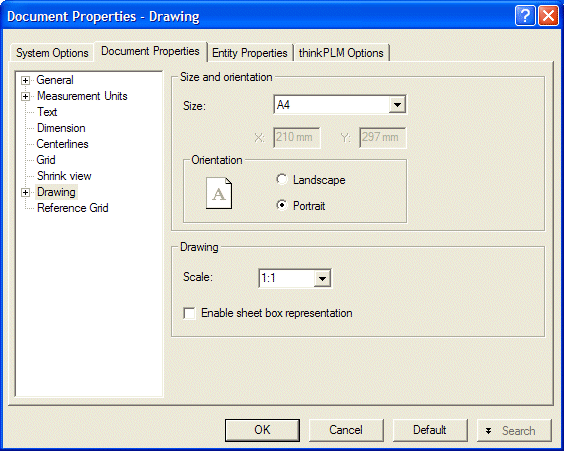
The Drawing category of the Document Properties has been changed to reflect the new management of Drawing Frames and Title Block:
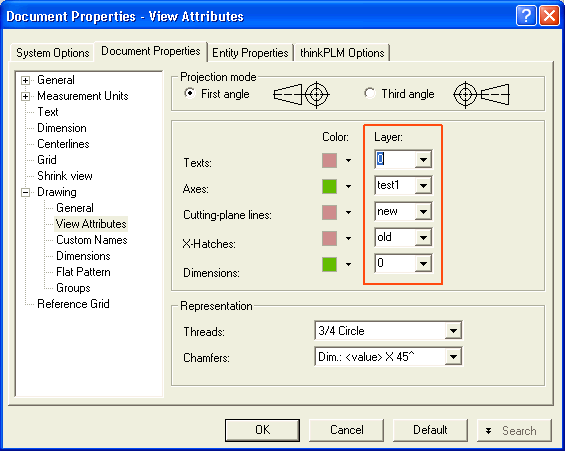
In previous versions you could specify a layer by typing the corresponding number in a box. Now all those boxes of the layers column in the Document Properties - Drawing - View Attributes category have been replaced with an editable drop-down list (as shown in the image below) in which you can either choose an existing layer or type in the name of a new one to create it.
The Work Plane category present in the previous versions has been removed henceforth. The options in this category were used to control the display and appearance of the Work Plane. Now these controls have been integrated into the options of the new System Options - Reference Systems and System Options - Reference Systems - Appearance categories.
The New Toolbar Object command has been introduced in order to enable you to have full control of the customization of existing Dimension Properties toolbars and to enable you to create new ones.
You can find this command in the context menu of the properties of the Dimension and Text categories of the Entity Properties. Refer to the online documentation for a detailed description of the New Toolbar Object command.
The following user interface enhancements have been made in this category:
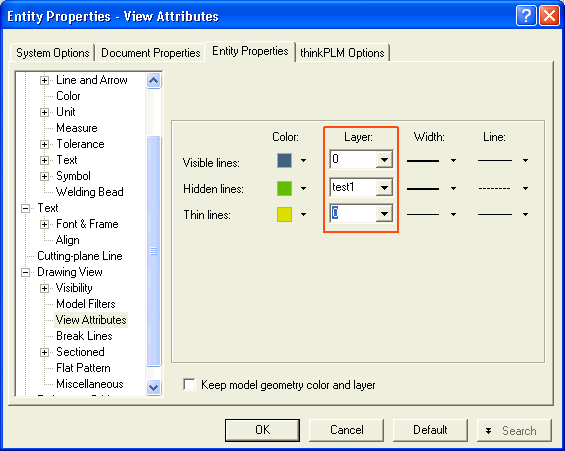
In previous version you could specify a layer by typing the corresponding number in a box. Now all those boxes of the layers column in the Entity Properties - Drawing - View Attributes category have been replaced with an editable drop-down list (as shown in the following image) in which you can either choose an existing layer or type in the name of a new one to create it.
This version introduces the new Hole Table Options dialog box to control the customization settings of a Hole Table. The properties of a Hole Table can be edited, using the new Hole Table Options dialog box, in two ways:
 OrganizeHole Table command.
Once the current settings are saved, they will be available every time you run the command. The saved settings survive the program session. However, for the ModifyDimensionHole Table command, the program loads the configuration last used to create the same Hole Table.