Creating a Define Section View
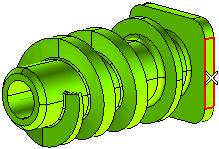
The following illustration is about creating a section view. Open the section_view.e3 file available in the Samples folder of your think3 installation and follow the steps given below.
- Start the Define Section View command.
- Now you need to define a reference plane; it acts a reference for defining the sectioning plane. Make use of the Reference Plane drop-down list to select one of the methods to define the reference plane, as described in the
How to define a plane document.
For this tutorial, you need to place the reference plane On Face by selecting the planar face of the base.
- Using the More Conditions drop-down list you can define the method to be used to define the sectioning plane. Refer to the Section View Options document to know about all the methods to define the sectioning plane.
For this tutorial, select the Parallel & point option.
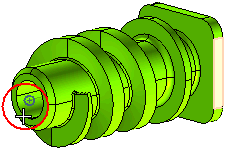
- Now select the center point of the hole as shown in the image below.
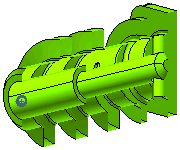
- The view of the model gets sectioned by a plane parallel to the selected face and passing through the center point of the hole. The section view will appear as shown below.
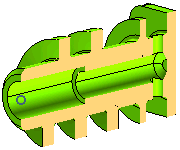
- Under More Options there are options to define the capping surface. On selecting the
Show Capping check box, a capping surface is displayed at the location where material is present in the model but has been cut due to display the section view.
You can also highlight the section edges by selecting the Show section edges check box.
Also try to ...