Once you have started the Surface Continuity command, you can proceed as follows (please note that you can follow this step-by-step example by loading file: "Continuity.e3").
| 1 | In the Degree drop-down list, select Positional. |
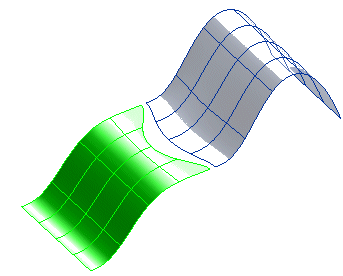
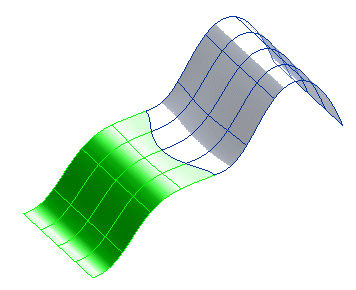
| 2 | Select the reference surface and then select the second surface. Select both of them by clicking close to the border along which continuity must be applied:
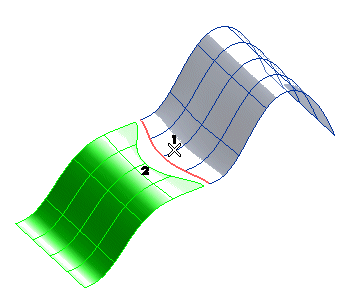 To change the selected surfaces (for example if you selected the wrong ones by mistake), right-click on Reference curve or surface and/or on Surface to Be Modified in the selection list, select Reset and perform selection again. As soon as the second surface is selected, a preview is displayed: 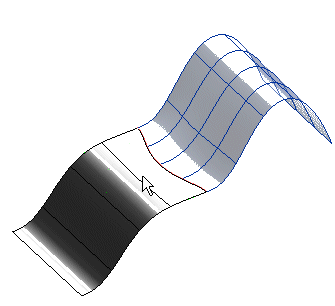 The preview in the above illustration was obtained by setting the Method drop-down list to Fit reference surface. If you select Adjust both instead, the preview changes to the following: 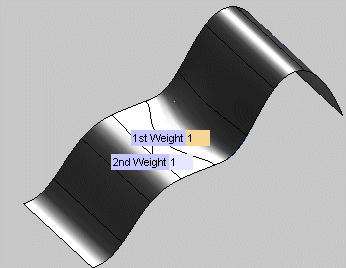 See Setting the continuity method for further details. |
| 3 | If the boundary along which continuity is to be applied is the entire boundary for one of the involved surfaces and only a part of the boundary for the other — which doesn't apply to the current example — select one of the options in the Scope drop-down list. See Applying continuity locally or to a whole boundary for further details. |
| 4 | Select Check Continuity under More Options to check the quality of the resulting surfaces. See Checking continuity data for further details. |
| 5 | Click  or or  to confirm your selections and create the surface. to confirm your selections and create the surface.
 Click  to discard your changes. to discard your changes. |