Using the constraint
The following steps give a quick introduction to the Symmetry Constraint command:
- In the 2D Profile environment create 3 lines in any random order. Do not pre-select any line.
- Start the Symmetry Constraint command —
 .
.
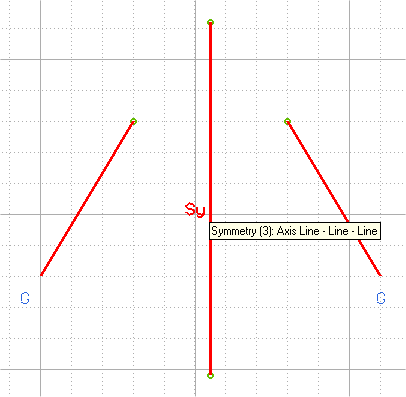
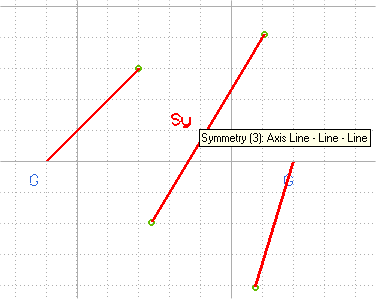
- From the selection list of the command, click the selector First Group. Now, click on any one line to select it.
- Now, from the selection list, click the selector Second Group and click on any other line to select it.
- Now in the selection list a third selector — Axis Line — will appear. Click on it and click the third line you have created to select it.
- The constraint is now applied. The program adds the Sy identifier for symmetric entities. You can now try to change any of these three lines and they will get modified while maintaining the symmetry with respect to the symmetry axis line.
The following steps describe the meaning of "sense" in the Symmetry Constraint command.
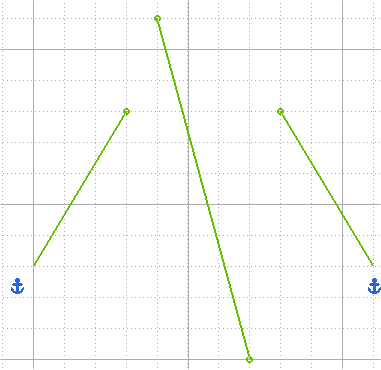
- In the profile mode create 2 lines in any random order. Make sure, you create them with the direction from the top to the bottom of the screen. Let their end points be on a same level. Now create a third line between these 2 lines, again with the direction from the top to the bottom of the screen.
- Using the constraint, ground the lower points of lines at the extreme ends. You may get a profile as shown:
- Do not pre-select any line. Start the Symmetry Constraint command — .
- To select the First Group of entities, click on the line on the left to select it. Right-click and select Continue to end the selection of the first group of entities.
- To select the Second Group of entities, click on the line on the right to select it. Right-click and select Continue to end the selection of the second group of entities.
- Now in the selection list a third selector — Axis Line — will appear. Click the third line you have created to select it.
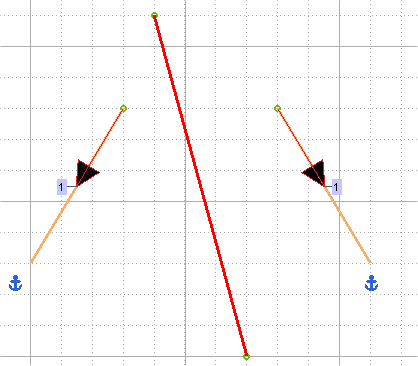
- The constraint is now applied. The program adds the Sy identifier for symmetric entities.
Note the relative position of the 2 lines with respect to each other and the axis line.
- Now we will try to change the sense of the symmetry. Undo your last operation, the Symmetry Constraint command.
- Repeat the steps from 3 to 5. After selecting the second group, invert the direction of the line by double-clicking on its arrowhead. Select the axis line as in the previous case.
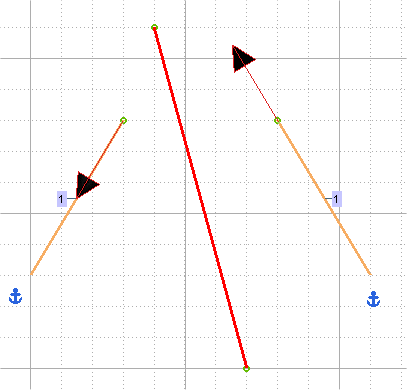
- The constraint is now applied. The program adds the Sy identifier for symmetric entities.
Note the relative position of the 2 lines with respect to each other and the axis line.
Related Topics
Tips and Tricks