Texture mapping
The Texture Mapping option is available in three commands:
- Decal: To edit the mapping of a decal image on the selected entities
- Texture Space: To edit the mapping of the selected entities, which impacts both decals and textured materials applied on them.
- Edit a material: To edit the mapping of a material, which impacts all entities attached to this material, except the ones with their own texture space (created with the precedent command).
Mapping types
Given below are the different types of mapping available in the Texture Mapping drop-down list. The following images show a car dash board model being texture mapped using different methods. Note that each mapping renders a different look to the model, though the textured image is the same.
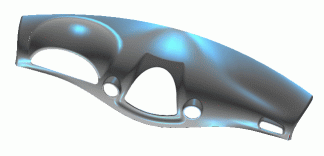 |
Original Model |
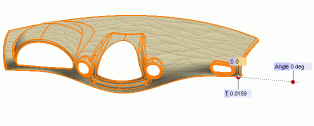 |
UV: assigns the parametric coordinate system for the mapping |
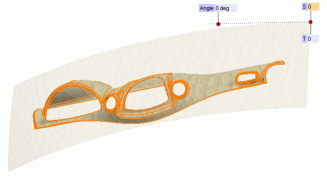 |
Sphere: all points in space are mapped onto a sphere |
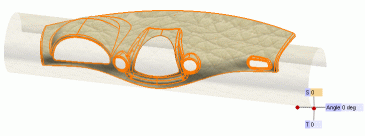 |
Cylinder: all points in space are mapped onto a cylinder |
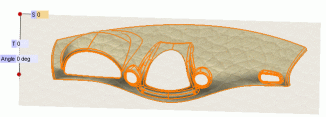 |
Plane: all points in space are mapped onto a plane |
The Automatic option lets the app choose the mapping mode it considers best among the sphere, plane and cylinder for the selected entities.
Note
When mesh entities are involved in a texture mapping, UV method is not available. If UV mapping was selected before adding a mesh, the mapping type will switch in the Automatic mode.
|
Scaling
The Same scale check box is available under the Texture Mapping node.
-
When the check box is cleared, the application lets you apply Scale S and Scale T values independently (anisotropic scale). Here you can choose to have the scaling values in the S (horizontal) and T (vertical) directions, as you enter them in the respective edit boxes. Note that in this case the image might be distorted, if the original aspect ratio is not maintained.
Note
The Scale S value controls the width of the image and the Scale T value controls the height of the image.
|
- When the check box is selected then the image's width to height ratio (aspect ratio) will be kept constant. The application tries to do the scaling automatically depending on the selected mapping. However, you can enter the required scaling value in the Scale edit box. For example, when you enter a value 10, the image is magnified 10 times, keeping the original aspect ratio. Similarly when the value entered is a decimal value, say 0.5, the image will be rescaled to half.
Advanced Options
The advanced options help the user to provide additional controls over the textured image.
-
The Reflection S and Reflection T check boxes 'flip' the texture image in T and S directions. It produces a mirroring effect.
- If the box is checked, the image will be flipped (mirrored) along the corresponding direction.
- If the box is not checked, the image will not be flipped.
-
The Show mapping surface option enable you to view the mapping surface. This option is not available for UV texture mapping.
- When the check box is selected, the mapping surface is highlighted in the model.
- When the check box is cleared, the mapping surface is not highlighted.
-
The Show Handles option enable you to view mapping mini-dialog boxes in the graphics area. The mini-dialog boxes are the Angle, Radius, Offset T, Offset S. The display of these options varies according to the selected Texture Mapping type.
- When the check box is selected, all mini-dialog boxes are displayed on the surfaces.
- When the check box is cleared, none of the mini-dialog boxes are displayed.
-
The Normal (plane type only) and Axis Direction (cylinder type only) options are used to set the direction of the applied mapping surface.
Related Topics


