Creating a cooling system
The following tutorial explains a situation where you will create a cooling network using the Mold Cooling command. Open the cooling.e3 file available in the Samples/mold folder present at the installation location and follow the steps given below.
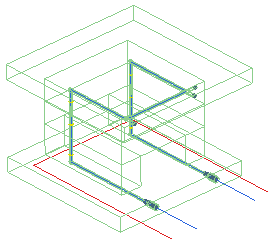
- First you need to create the required cooling path, which can either be a 3D or 2D profile. In the model you have opened, the cooling path is represented by the blue profile.
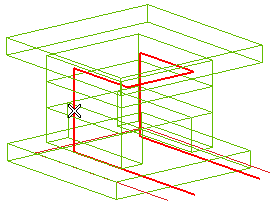
- Start the Mold Cooling command and select the path, as shown in the image below.
- You can optionally check for the interference gap and the drill length by selecting the Interference and Drill Length check boxes, Click here for details.
- You can optionally expand the Information on Hole node to display the Information on Hole dialog box. Click here for more details.
- Under More Options the Catalog Type drop-down contains the list of the installed catalogs for various vendors. Select for example D.M.E and also select the standard parts check boxes (Nipple, O-Ring and Plug) in the selection list. Click here for details.
The standard parts are visible in the cooling path. You can toggle the Hide Preview ( ) and Show Preview (
 ) button to view the standard parts in the cooling path.
- Click
 or
or  to confirm your selections and create the cooling system between the plates of the mold.