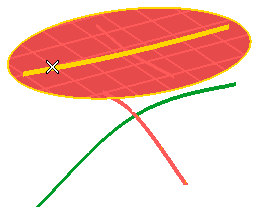
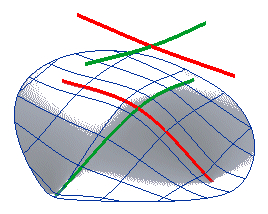
In this job you will apply a controlled modification to a shape using virtual vertices. A virtual vertex is defined when two curves are supposed to "cross" each other without necessarily exactly intersecting.
This step-by-step example can be accomplished by loading file "VV.e3".
| 1 | After starting the Advanced GSM command, In the Entities drop-down list (under Entities To Be Modified) select Surfaces. Then select the blue surface, right-click and select Continue: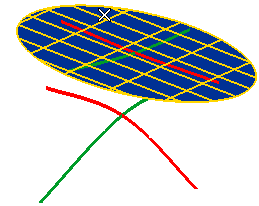 |
|||||||
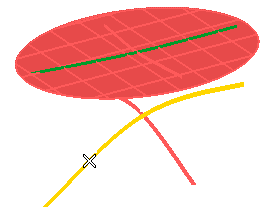
| 2 | Proceed as follows:
|
|||||||
| 3 | Proceed as follows:
|
|||||||
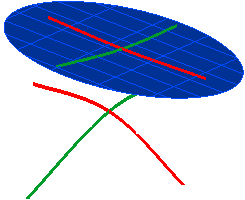
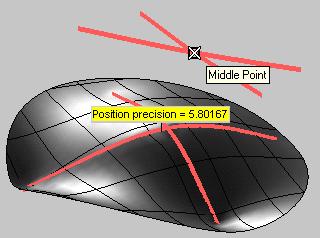
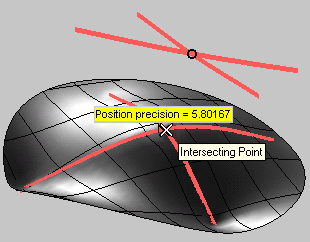
| 4 | Select the preview button (  ). The resulting surface will be displayed: ). The resulting surface will be displayed: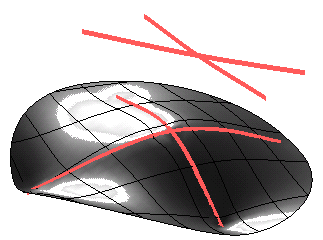 As you can see, the isoparametric curves in the center of the surface are not as smooth as you may want. In fact, if you click the "warnings" button (  ) a high precision value is displayed: ) a high precision value is displayed: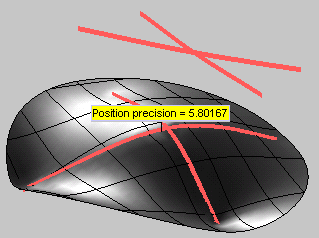 |
|||||||
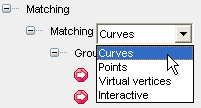
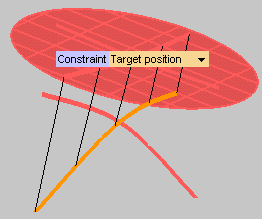
| 5 | To improve the surface quality, you can use Virtual Vertices. Scroll the selection list to its very bottom (you can scroll up and down the Selection List to reach the desired items using the specific arrows: 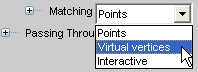 |
|||||||
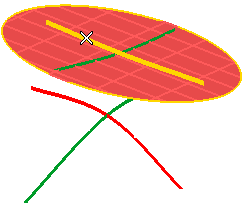
| 6 | Click Initial points under Group 1 and click close to the virtual intersection between the two curves above:
 |
|||||||
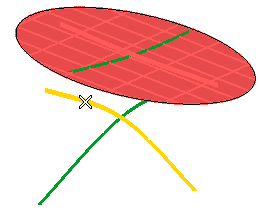
| 7 | Click Target points under Group 1 and click close to the virtual intersection between the two curves below:
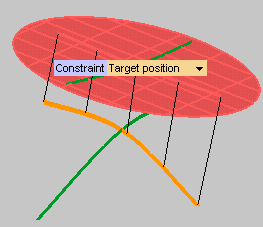
 The resulting surface is displayed. Mini-dialog boxes and warnings are also displayed:  As you got the "Invalid curve group matching group 1" message, which you can also expand by clicking Initial curves under Matching curves Group 1: you will have to enter a higher value for the Initial Ball Radius. This is the radius of the sphere inside which the virtual intersection between the two curves is searched for: if the two curves both intersect the sphere, the virtual vertex is detected. When you enter a higher radius, the probability to find an intersection are also higher. 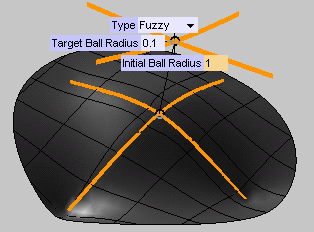 If you now display warnings, you will see the Precision value is much smaller then the one you obtained before using virtual vertices. 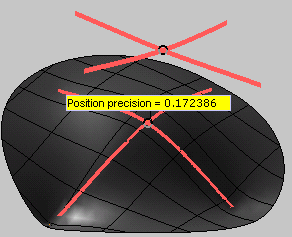 You can even increase the precision and refine you result by using the Precision dialog box, as described in Checking your results.
|
|||||||
| 8 |
Click  or or  to confirm your selections modify the shape of the object. to confirm your selections modify the shape of the object.
 Click  to discard your changes. to discard your changes.
If you selected the Copy check box under More Options, your original surfaces will still be there: they are hidden if you selected the Hide check box. The new surfaces which originated the new shape are surfaces of the type "GSM". |