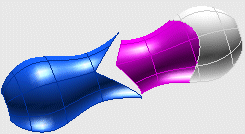
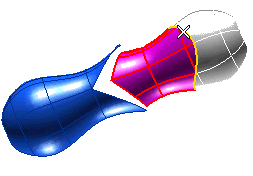
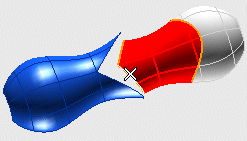
Start the Advanced GSM command. You will fill the gap between the violet and the blue surface, in order to apply continuity along the common borders. Continuity between the violet and the white surface will be preserved.
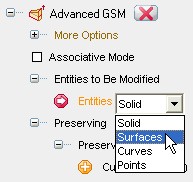
In the Entities drop-down list (under Entities to Be Modified) select Surfaces.
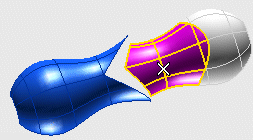
Then click on the violet surface.
| Suggestion about selection
In some situations, to make selection easier, it can be useful to select the entities to be modified after the entities to match and/or to preserve. This way, selection is much quicker, as nothing is highlighted in the model. On the contrary, especially in complex models, if you first select the entities to be modified, recognizing and selecting the entities to match and/or to preserve among a number of highlighted entities might not be as easy. |
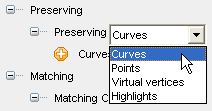
Click on Curves (Group 1) and select the border between the violet and the white surface.
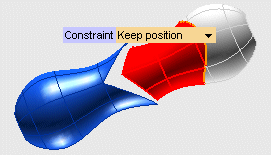
Select Keep position+tangent+curvature, so that all of the said continuity types will be preserved along the selected boundaries.
| Keep projection constraint
In a number of situations you may need to modify a solid while keeping the projection onto a certain plane unchanged. For example, you may need to change the shape of a car hood without modifying the car front. A specific option is now available among the Constraints: Keep projection, which enables you to avoid changes along a given direction, to be selected in the Projection direction drop-down list. |
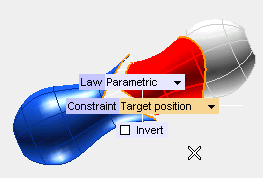
- Under Matching, in the Matching drop-down list, select Curves
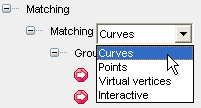
- Select Initial curves under Matching curves, Group1. Then click on the two boundary curves of the violet surface you want to join to the blue one.
- Select Target curves. Then click on the two boundary curves of the blue surface.
| Scrolling the Selection List Please note that you can scroll up and down the Selection List to reach the desired items using the specific arrows: If you hold down the SHIFT key when clicking the arrows, you will scroll five items at a time instead of just one. |
- Set Law as Parametric
- Set Constraint as Target position
You can also interactively modify surfaces in specified points, as described in "Interactively moving points".

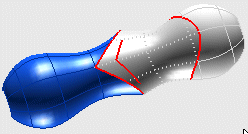
to display a preview of the result.
 or
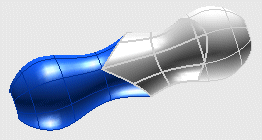
or  to confirm your selections and modify the shape of the object.
Click
 to discard your changes.
- If you selected the Copy check box under More Options, your original entities will still be there
- While you are using the command, you can select the Hide check box to temporarily hide the original entities, in order to better appreciate the changes you are making. The entities will be hidden only as long as the command is being executed.
- The new surfaces which originated the new shape — if you did not select the Associative Mode check box, in which case, you would get solids instead of surfaces, as shown below — are surfaces of the type "GSM".
- If you deselected the Copy check box, the original entities will be modified.
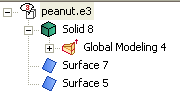
- If you selected the Associative Mode check box, the result you obtained is a solid, and the Model Structure will look like the following: