| Parallel direction | to define the sight direction as parallel to a direction you can set in the Direction drop-down list (see " How to define an axis or a line" for details). |
| Sight point | to define the silhouette curves as the ones you obtain by intersecting lines starting from a Sight point with the selected surface contours. |
| View direction | To create the silhouette curves along the view direction, which can be either orthogonal or perspective. |
The sight direction can also be defined interactively by selecting the Interactive direction check box.
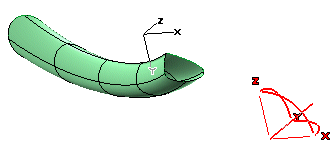
| Interactive direction definition The Silhouette option of the Light Contour Curve command can be particularly useful in molding, in order to define and create parting lines, which you can easily do using the Quick preview option. If you already know the direction enabling you to obtain the best parting line, then you don't need to use the Interactive direction definition. On the contrary, if your model is a complex one and you need to determine the best parting line you can get, then you can take advantage of using the Interactive direction definition along with the Quick preview option. In fact, with this method you can interactively try as many different directions as you like and each time get a quick preview of the resulting parting line. In addition, the interactive direction definition method also creates a line in the chosen direction. |
As soon as the Interactive direction box is selected, a 3D-handle is displayed in the right-bottom corner:
To interactively define the sight direction, you can:
- Rotate the sight direction about each of its axes (one at a time) just by dragging the corresponding handle (the one marked with X, Y, or Z), or click on the handle and supply the rotation Angle value.
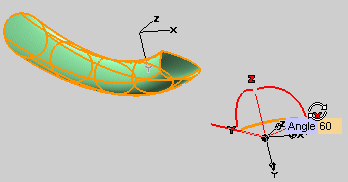
- Select one of the predefined directions in the Direction drop-down list (see " How to define an axis or a line" for details).
 ). The silhouette curves will be drawn (this might take some time if the model is a complex one).
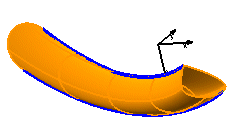
- When Insert Curve on Surface is selected, the resulting curves will be of the Curve on Surface type (see " Curves on Surfaces" for details).
- When Insert Curve on Surface is cleared, the curve type depends on the command and on the situation (generally a NURBS). In this case, an additional option is available under
More Options:
High quality approximation.
- When the check box is selected, the resulting curves will be G3 or G4 continuous and will have higher degree.
- When the check box is cleared, the resulting curves will have degree 3 and continuity 2.
The Associative Mode check box is also available, enabling you to create curves which retain a link to the surface they derive from.
To go on with the task, deselect the Project on Plane check box and set the Boundary Color to red.
 or
or  to confirm your selections and create the silhouette curves.
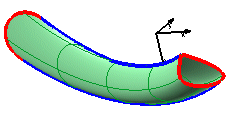
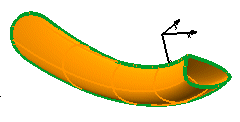
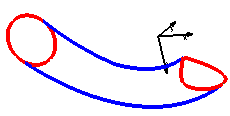
Please note that if you chose the Interactive direction definition method, a line is also created to display the sight direction used to create the silhouette curves (in the picture below, the one pointed out by the red arrow):

Click
 to discard your changes.
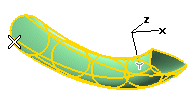
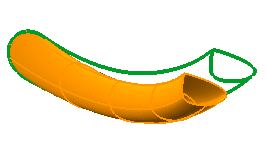
Hide the surface to fully appreciate the result:
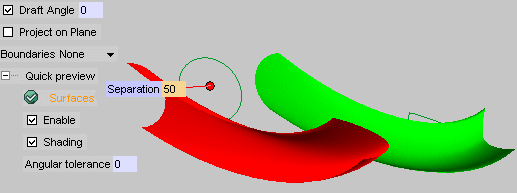
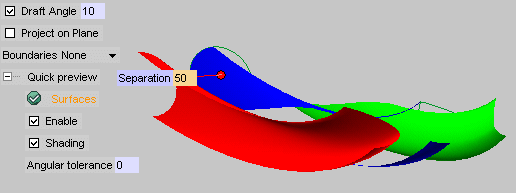
| Quick preview The Quick preview option enables you to display a fast preview of the parting line, which can be displayed as a line or by shading surfaces using two different colors (or three, where the third is used for vertical areas). This will enable you to quickly recognize the parting line on the surface, so that you can select only those surfaces to which computation must be applied. If the result is different from the preview, it generally depend on tessellation. You can improve the display by supplying lower values in the Boundary tolerance: and Surface tolerance: boxes or by properly moving the tessellation slider.
|