To change the selected curves, Curves in the selection list, select Reset in the context menu and perform selection again.
Click the preview button (
 ) to get a shaded preview of the parting plane
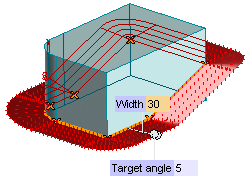
If some problems are detected when creating the parting plane, a special warning icon is displayed on top of the selection list (
 ), and a specific label indicating the type of issue is displayed on the model in the position where the problem occurs. You can hide the labels by clicking on the previous icon, that will turn to
  .
.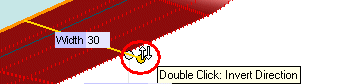
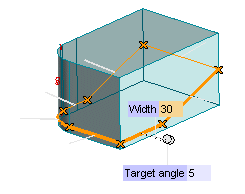
To invert the sign of the supplied value, double-click on the anchor.
Select the Second Width check box to specify the second side width and type the latter — the internal one — inside the adjacent box.
| Standard | The parting plane is generated by moving a straight line perpendicularly to the direction of ejection (or pull direction) and to the tangent of the parting line. This mode is generally quicker, but it absorbs fewer parting "line" tangency discontinuities than the other two and doesn't enable you to release the target angle. |
| Optimized | The parting "plane is generated by moving a straight line perpendicularly to the direction of ejection and to the tangent of the parting line. It absorbs more parting "line" discontinuity than the standard method, thus resulting a bit slower. |
| Advanced | The parting plane is generated by an advanced method that tries to absorb the parting "line" tangency discontinuities (and thus is slower). This mode makes the resulting shape piecewise more NC machinable than the other ones. |
| Min. fill. width=5 | Min. fill. width=20 |
 |
 |
This value is very important in Numerical Control manufacturing, for example when using a rolling tool. It can be used to determine the biggest tool before gauging or undercutting. A warning is displayed when the curvature radius is smaller than this value.
As soon as the More Options button is selected, The Transitions item is displayed in the selection list and a cross marker is displayed on each transition point (connecting points between adjacent curves in the parting line). Initially, all transition points belong to the same group (the Points (Group 1 Default) selector in the selection list).
- To define the type of transition for all the points of Group 1, click on Points (
Group 1
Default). The
Transition drop-down list will be displayed in the model. You can choose the transition type among the following:
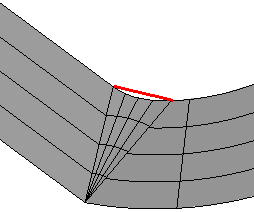
The chosen transition type will be applied to all the transition points belonging to the group.Sharp No optimization on a transition of this type. It is the transition you get simply keeping the plane perpendicular to the direction of ejection or satisfying the target angle. Sharp edges may be generated.
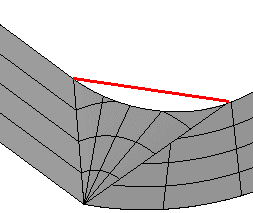
Tangent The system tries to absorb the discontinuity. It may result a filling surface that may have a conic point at the corner.
- To change the transition type for one or more points, you'll have to move it/them to another group:
- Click on the next yellow Points ( Group n) item in the selection list.
- Click on the point(s) to be moved.
Note that changing a transition type when the advanced generation is requested may affect the global resulting shape.
 or
or  to confirm your selections and create the surfaces.
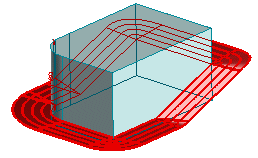
Click
 to discard your changes.