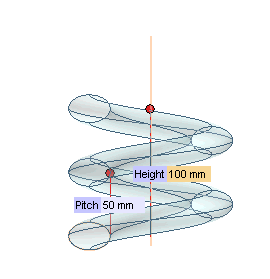
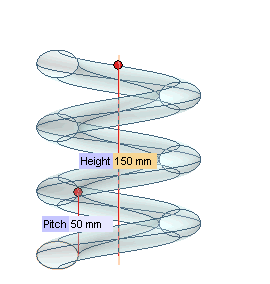
The Pitch and Height boxes are displayed.
 or
or  to confirm your selections and create the surfaces.
You can follow the easy steps of this example to see how to create a helical set of surfaces based on a given value for the step and for the height. Before starting, open sample file "HelixSurf.e3".
| 1 | Start the Helix Surface command. |
| 2 | Check that the Rotation drop-down list is set to Clockwise. If it isn't, set it to Clockwise. |
| 3 | In the Mode drop-down list, select Pitch and height. |
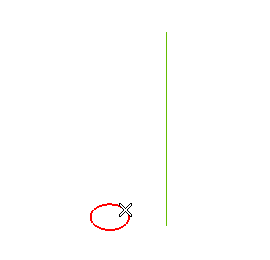
| 4 | Select the curves to swept in order to create the helical surfaces and end selection by right-clicking and choosing Continue in the context menu.
|
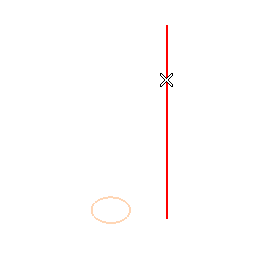
| 5 | Set the Axis drop-down list to
Line (see "How to define an axis or a line). Then select the line.
The Pitch and Height boxes are displayed. |
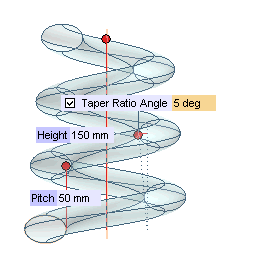
| 6 | Drag the Height handle to the desired position, or type in the corresponding value.
|
| 7 | Expand the More Options node. The
Taper Ratio Angle check box will be displayed. Check the box and type the desired taper angle value in the adjacent box immediately shown up. |
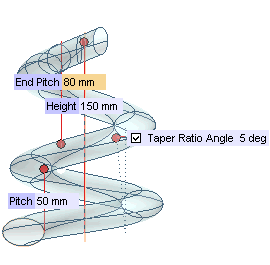
| 8 | Make the pitch variable by selecting the Pitch law check box. In the adjacent drop-down list, select
Quadratic to have the pitch vary according to a quadratic law from the initial value (
Pitch) to the final one (
End Pitch) that you will specify. |
| 9 | Click or to confirm your selections and create the surfaces.
|
| Note Remember the command does not create a single surface: each complete turn of the helix is a separate surface, though there is curvature continuity along each common border. |