Generating the Rear Face of a Punch Head using a Fuzzy Offset Surface
At times the punch is made hollow to achieve weight reduction. In this case, the front contact face of the punch will have the exact form that is to be achieved on the sheet metal. Whereas, the rear face need not have the precise form but should provide sufficient thickness to suffice the strength requirements of the punch. The Fuzzy Offset command is very useful in generating this rear face, as shown in the following example.
Consider the following punch that is currently attached with the punch holder.
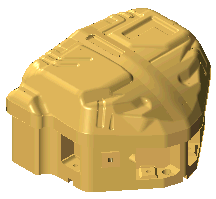
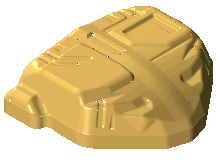
As shown in the following images, the front face of the punch has all the details that need to be formed on the sheet metal. However, the rear face of the punch (highlighted in grey) only has an impression that roughly matches the contours of the front face.
 |
 |
| Front face |
Rear face |
The profile of this rear face can be easily generated by creating a fuzzy offset surface from the front face. The following steps can be performed to generate this rear surface using the Fuzzy Offset command.
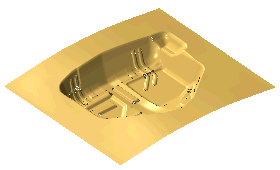
- You have to start with the surface profile of the front face, as shown in the image below.
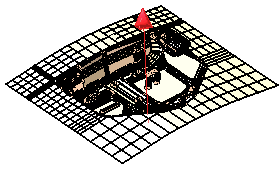
- Start the Fuzzy Offset command and select the skin. You can toggle the direction by double clicking on the red arrow. Ensure that the direction of offset is upward.
- Make the necessary settings in the selection list. In reference to the current example, the following settings were made.
- Offset = 30
- U Degree = 6
- V Degree = 6
- Iterations = 7
- Select the Preview (
 ) button to apply the settings and generate the preview of the offset surface. Finally, apply the command to generate the fuzzy offset surface, as shown below.

- Now the offset surface and the original skin can be trimmed to generate the required die form.
Try to ...