Since Version 2008.1, the old thinkreal static rendering plug-in has been overhauled and restructured completely to give us the new Renderer product. The new product unifies the approach to setting up all rendering information.
The user can now generate better photo realistic rendering effects of the models with very easy steps and manage rendering information effectively. To achieve realism, it is possible to setup materials, lighting, decals and define the environment to the model in easy steps. The user also gets a library containing predefined materials, Light Studios and environments to be directly applied on the model at the click of a button, giving the user the ability to create a rendered image of the product quickly.
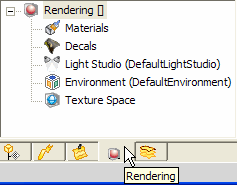
To manage the information about the parameters that is being used for rendering, the render data tree has been provided. It can be accessed by selecting the Rendering tab, as shown below.

Following are the various rendering tools that can be used to generate the required rendering effect:
Note
|
The Rendering Library provides predefined Material, Light Studio and Environment, that can be used to add rendering effects to a model.
On starting the View Rendering Library command, a side window is displayed towards the right of the Graphics Area, as shown in the image below. It contains three tabs - Material, Light Studio and Environment - to select and attach respective rendering data to the model.
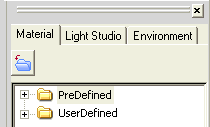
| Note All the tabs of the Rendering Library will have the PreDefined and UserDefined folder in them. The items present in the PreDefined folder cannot be directly edited, deleted or renamed. However, they can be edited after applying it to the model and then saved into the UserDefined  Import folder by using the Save to Library command. Alternately, you can also copy items from the PreDefined folders to UserDefined folder for instant accessibility. Import folder by using the Save to Library command. Alternately, you can also copy items from the PreDefined folders to UserDefined folder for instant accessibility. |
|
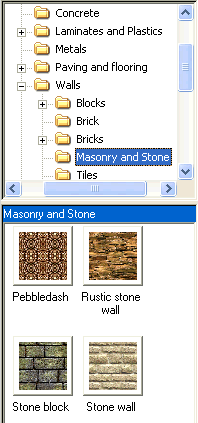
The Material tab displays the material library with predefined set of standard materials. All the materials are categorized and saved in an appropriate folder. By exploring the folders you can browse through the various materials in it and see their preview in the preview pane, as shown in the image to the right. The material can be attached to surfaces, solids or components. There are four distinctive methods to attach the material:
Once a material is attached, it is displayed in the Render Data tree under the Materials node. You can right-click on the material name in the Render Data tree and select additional commands, as shown in the image below. |
 |
On starting the Edit command, the Edit Material selection list is displayed. Here, you can modify the visual properties of the material (like color, reflectance, transparency and displacement) and its physical property (like density).
The commands in the context menu displayed by right clicking on the material in the preview pane allow you to Attach, Copy, and Export it.
| Note If the material is attached to a surface or component, then no physical property is associated to it. |
More material related commands can be started by selecting Material from the context menu displayed by right clicking the entity in the Graphics Area to which the material is attached. For instance, once a material is edited, it can then be saved into the library (using the Save to Library command) to be directly used later on.

The Light Studio tab displays the Light Studio library with predefined set of lights in each studio. All the Light Studios are categorized under specific folders. By exploring these folders you can browse through the various Light Studios in it and see their preview in the preview pane.
To set a Light Studio current, right-click on it in the preview pane and select Set as Current. Alternately you can double click on the Light Studio name. Once a Light Studio is activated, its name appears in the Render Data tree.
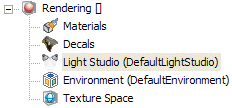
To edit the applied Light Studio, right-click on its name in the Render Data tree and select Edit. The Lighting selection list is displayed. You can make various settings for each light present in the Light Studio. This includes turning ON and OFF individual lights, change their type, intensity, color and direction. You can also define how the shadows will be formed.
| Note At a time only one Light Studio can be set current to a model. |
The Environment tab displays the predefined set of environments. All the environments are categorized and saved in appropriate folders. By exploring these folders you can browse through the various environments in them and see their preview in the preview pane.
On applying an environment, you actually map a texture onto the background and foreground of the model, thus providing the impression that the model is present in a natural surrounding.
To set an environment current, right-click on it in the preview pane and select Set as Current. Alternately you can double click on the environment name. Once an environment is activated, its name appears in the Render Data tree.
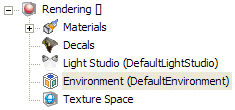
To edit the applied environment, right-click on its name in the Render Data tree and select Edit. The Environment selection list is displayed. You can make various settings to define the background, foreground, reflection and scenery. The scenery is a think3 application (*.e3) scene, which can be imported into the model to represent the geometrical scene around it.

The Insert Decal command enables you to attach an image over the surface of the model. The process is analogous of applying a sticker over an object.
The sticker is considered to be a texture that is applied by mapping it over a surface. This process is therefore called texture mapping. After starting the Insert Decal command, you have to select the surface and an image to be applied over the selected surface. Thereafter, you can make various other settings to manipulate the way the texture is mapped over the surface by using the Insert Decal selection list. This includes scaling and positioning the texture image over the surface, controlling the transparency and bumps, setting the reflectance etc.
The applied decal can be edited using the Edit Decal selection list. There are two ways to run the Edit Decal selection list.
 Edit from the context menu.
Note
|

The Format Lighting command initiates the editing of the currently active Light Studio. A new Light Studio can be applied by using the Light Studio tab of Rendering Library command.

The Format Environment command initiates the editing of the currently applied environment. A new environment can be applied by using the Environment tab of Rendering Library command.

The Insert Texture Space command provides a means of mapping images in 3D models. This command maps the decals/wrapped materials (2D materials) inserted by using the Material and Decal commands. Also, different types of mapping of images can be done on different surfaces in the same model.
The applied mapping can be edited using the Edit Texture Space selection list. There are two ways to run the Edit Texture Space selection list.
 Edit from the context menu.
Rendering is the process of generating an image from a model containing rendering information like lights, material, decal, environment. This helps in understanding the final appearance of the model in a user defined environment. The final visualization of the rendered model can be set in the new Rendering category. The rendering effect is generated by the following commands:
The Format Rendering
 Preview command enables you quickly render the model. The quality of the rendering is not of high quality, but it enables the user to have the first look of the rendered image.
The Format Rendering
 Ray Tracing command enables you to render the model as a fully shaded and textured, antialiasing image using the full ray tracer render. The geometry is sampled at a sufficient rate to eliminate aliasing artifacts in regions of high intensity gradient.
The Format Rendering
 Final Gathering command enables you to view the model from a point of view. After primary ray hits the point on objects, final gather is activated and shoots additional rays in the scene collecting color information around the point for which the color is then computed. Final gather renders a model that yields extremely realistic shading effects.

All the new rendering functionalities of ThinkDesign have been described earlier in this document. For further details see thinkreal vs Rendering in ThinkDesign.
