Creating a Core and Cavity
In this tutorial you will create a cubical and a cylindrical core and cavity using the Split Mold command. Open the soap_dish_assembly1.e3 file available in the Samples/mold folder present at the installation location and follow the steps given below.
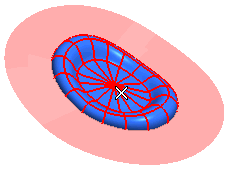
- Start the Split Mold command and select the mold part, as shown in the image below.
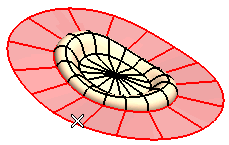
- Click on the Parting Skins selector and select the parting plane as shown in the image below.
- From the Workpiece drop-down list select
Cube.
- Select Symmetric from the corresponding
Height Extension,
Width Extension and
Depth Extension drop-down lists.
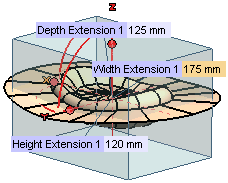
- Enter 120, 175 and 125 in the Height Extension 1,
Width Extension 1 and
Depth Extension 1 mini-dialog boxes respectively as shown in the image below.
- From the Workpiece drop-down list select
Cylinder.
- Select Double from the
Height Extension drop-down list.
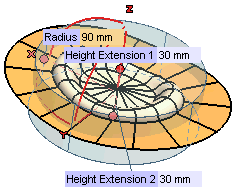
- Enter 30 in both the Height Extension 1 and
Height Extension 2 mini-dialog boxes respectively. Also enter 90 as radius in the
Radius mini-dialog box as shown in the image below.
- The Axis Alignment option available enables you to set the axis of extrusion for the core and cavity created. Click here for details.
- Click
 or
or  to confirm your selections and create the core and cavity.
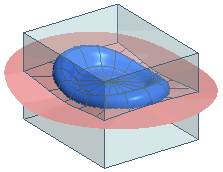 |
 |
| Cubical |
Cylindrical |
Note
Two files of core and cavity are created as components and is also highlighted in the
Model Structure |
Also Try to ...


 or
or  to confirm your selections and create the core and cavity.
