
![]()
Insert MoldDesignElectrode
The Mold Electrode command enables you to reproduce accurately a complex geometry. This is used in situations where these complex geometries cannot be machined on the core and cavity by the conventional methods.
On starting the command, you can enter the name of the electrode in the Name text box. Select a set of faces which define the shape or geometry of the electrode for the Faces selector.
The Spark Gap check box is used to optionally give a spark gap. A spark gap is the distance between the core and the electrode created. There may be change in the geometry of the core or electrode while ejecting the electrode from the core without the spark gap. So defining the spark gap is essential for a good electrode design.
| When the Spark Gap check box is selected, a Spark Gap mini-dialog box is displayed over the model in the Graphics Area. Enter the gap value in the mini-dialog box. The spark gap is highlighted by red arrows in the image. | 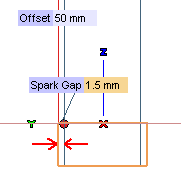 |
| When this check box is cleared, there will be no gap between the core and the electrode created. |  |
The Extension check box is used to optionally extend the surface that is selected as base. The following options when selected:
| Along direction | The base surface is extended along the direction of electrode created. | 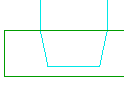 |
| By tangency | The base surface is extended tangentially in the direction of the electrode created. | 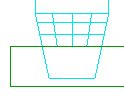 |
The Head Shape drop-down list is used to select the shape or geometry of the head of the electrode. The electrode head options in the drop-down list.
| Cube | The head is in the shape of a cube with the reference point on all the corners of the cube as shown in the image. | 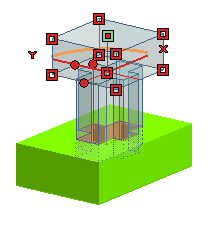 |
| Cylinder | The head is in the shape of a cylinder with the reference point in the center of the cylinder as shown in the image. | 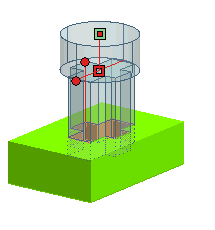 |
| None | There is no head to the electrode created. | 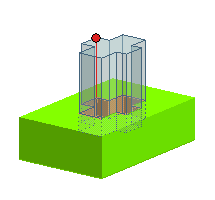 |
Show all reference points check box enables you to view the reference points on the electrode head.
On double-clicking any of the reference point, a datum point is created at the same location. The datum point can then be used for dimensioning the electrode using the Enable for electrode origin option.
Precision check box enables you to set the value of precision for the distance between the electrode head and the work plane origin.
End Axis Alignment
node enables you to align the cube electrode head with the X or Y axis. On expanding the node, the X Axis and Y Axis selector is available for the aligning electrode head. You can use the options available in the corresponding drop-down list.
| Note The End Axis Alignment node is available only when you select Cube from the Head Shape drop-down list. |