Creating surfaces starting from a wireframe model using GSM
This article shows how to use the Advanced GSM command to create very clean surfaces (with no degenerative points) on a wireframe model.
- The wireframe model is a good framework for building surfaces. However, in order to use the curves, we will have to join some (Modify
 Curve
Curve Union) and split others (Modify
 Curve
Curve Split) in order to get the boundary curves for the desired surfaces.
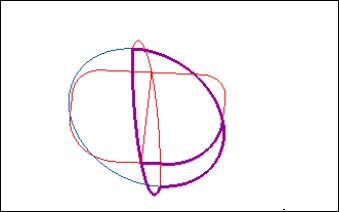
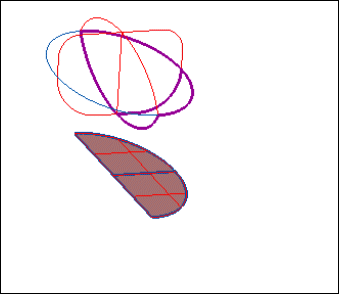
The purple curves are three curves obtained using the union and split curve command on the original wireframe.
- Now that we have clean curves, we need to project these onto a plane.
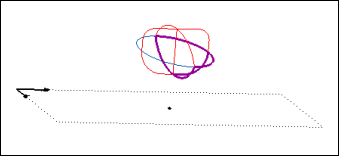
First, move the work plane so that it lies under the wireframe.
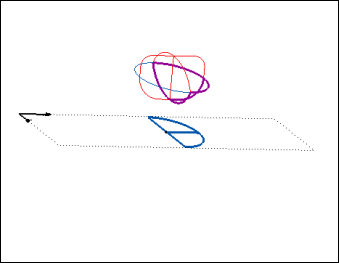
- Now, we are ready to project the curves (Insert
 Curve
Curve Project)
Start the command, making the following selections:
- Method - Normal
- On - Plane
- 3 Points and specify three points on the Work Plane (not lying on the same line)
Select the purple curves. Right-click, and select Continue in the context menu. Select OK ( ).
).
- We are now going to create a planar surface on the work plane. Select
Insert
 Surface
 Linear. Then
Select the long straight blue line, Direction X, and use the drag handle to create a surface that covers the other curves lying on the work plane.
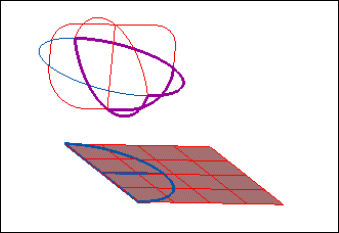
- In order to use Advanced GSM for this application, we need to create a surface that approximates the shape of the desired surface. Therefore, we are now going to trim the planar surface using the blue curves to create a half-moon shape.
Modify
 Surface
 Trim with Limits. Then:
- Select the two blue lines that create a half-moon shape and end selection.
- Select the planar surface to trim and end selection.
- Select the half-moon shape to keep.
Note: to explicitly select a boundary curve of a surface (versus the edge of a surface) hit the "C" key before selecting. This sets the filter to curves.
- Now we are ready to use Advanced GSM.
Modify
 Global Shape Modeling
 Advanced GSM.
We are only going to use the Entities to be Modified and Matching Curves sections of the selection list.
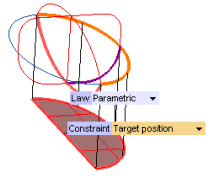
- The initial curves are the planar blue curves, and the target curves are the purple curves. We will match each of the blue curves with a target purple curve, resulting in 3 Groups of initial/target curves.
Note: Make sure that you highlight in the selection list (by clicking on the text) the selection you are making. For instance, Target curves is highlighted indicating that any curves selected will be target curves for Group 2.
You can always reset a selection by right-clicking in the selection list and choosing Reset in the context menu.
- Law - Parametric (to set the Law, click on More Options: the Law drop-down list will be displayed)
- Constraint - Target position
- In the the Entities drop-down list under Entities to be Modified, select Surfaces and then select the half-moon planar surface.
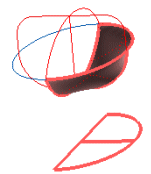
Right-click, select Continue from context menu. At this point, the Preview (
 ) button will be displayed at top. Hit the button, a preview will appear (rotate the model and the preview will be shaded).
- Select More Options.
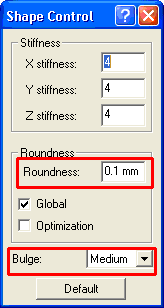
Click on the Shape Control button, a dialog box will be displayed. To change the shape of the surface that is created, change the Roundness factor, or the Bulge factor. In this case, Roundness=0.1 and Bulge=Medium creates a very nice surface.
After changes are made to values, a preview of the new resulting surface can be seen be hitting the Preview (
 ) button again.
- Once you are content with the resulting surface, click OK (
 ).
A dialog box will ask you if you would like to Freeze the command. Freezing the command will save the selections that have been made, and allow you to restore these selections the next time the Advanced GSM command is initiated.
- The resulting surface is a very clean surface with no degenerative points.
Additional surfaces can be added to the wireframe using the global modeling command. This time, when selecting initial and target curves, select the boundaries of the surfaces where the surfaces are going to meet (rather than the boundary curves). This will give you the option to target tangency and curvature continuity between the two surfaces.
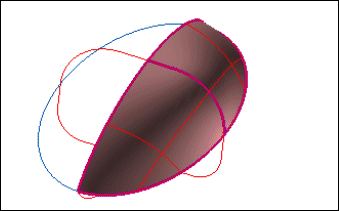
 Curve
Curve Union) and split others (Modify
 Curve
Curve Split) in order to get the boundary curves for the desired surfaces.
The purple curves are three curves obtained using the union and split curve command on the original wireframe.


 Curve
Curve Project)
Start the command, making the following selections:
 ).
).

 Surface
 Linear. Then
Select the long straight blue line, Direction X, and use the drag handle to create a surface that covers the other curves lying on the work plane.

 Surface
 Trim with Limits. Then:
 Global Shape Modeling
 Advanced GSM.
We are only going to use the Entities to be Modified and Matching Curves sections of the selection list.
 ) button will be displayed at top. Hit the button, a preview will appear (rotate the model and the preview will be shaded).

 ) button again.

 ).
A dialog box will ask you if you would like to Freeze the command. Freezing the command will save the selections that have been made, and allow you to restore these selections the next time the Advanced GSM command is initiated.