Creating surfaces with 5 (or more) boundaries can be quite difficult through manual construction methods. Even automatic construction methods of multi-sided surfaces only give mathematical results. These results are not always the way we would like leading to more work to tweak the surfaces to the desired shape.
This example will show you how to use Advanced GSM on surfaces to obtain surfaces with 5 boundaries. This process can also be used to create surfaces with 6 or more sides. Sometimes, surfaces of this type are also referred to as N-sided surfaces meaning they have an unspecified number of sides (please refer to the Introductory Examples for the basic information you need to better understand this document).
Using some basic input from you, GSM will do the difficult work for you and give you a very smooth and mathematically clean surface. We will create the initial surface for the Advanced GSM tool to work with. Then GSM will rebuild the surface into its new position in the 3D space based on our specific needs.
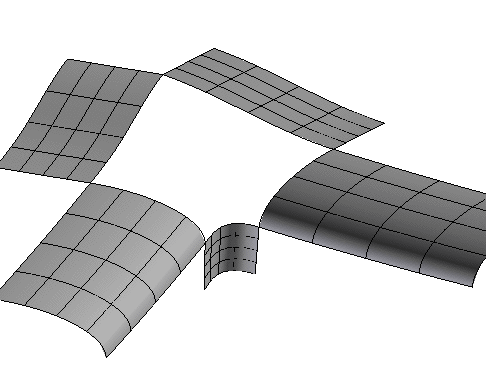
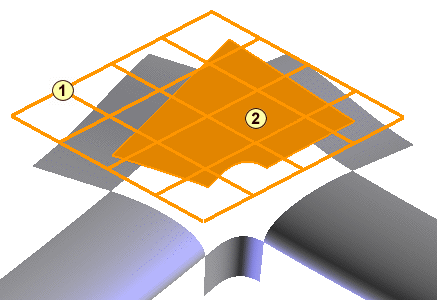
Here is an example of 5 surfaces that are touching at their corners. The surfaces create an opening that needs to be filled by a five-sided surface.
Here is a typical approach for solving this situation with GSM:
This is a very good approach for some situations, but can we create a better surface to start with. Instead of starting from a simple bounded plane, sometimes it is easier if we start with a surface that is similar to the surface we want to achieve, like the following green one:
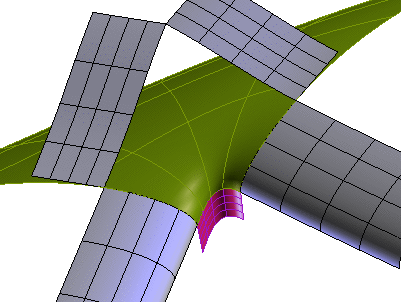
Here we are helping our situation by creating a surface (green) that already addresses the most difficult area of the five sided surface. The surface that we've created is a proportional surface that is tangent to the violet colored surface.
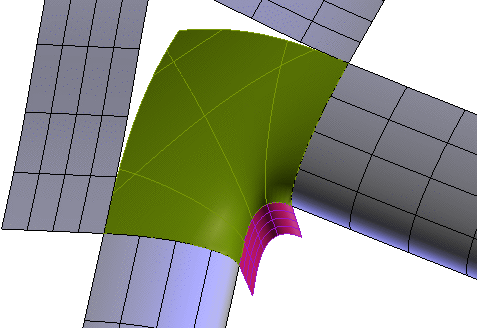
Here is the same surface. It has been trimmed from the top-view and the view rotated slightly to show that we still have two surface edges to match before our job is finished.
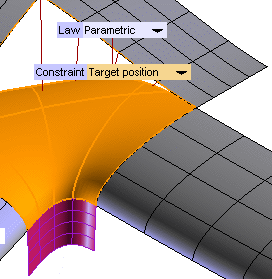
To avoid unexpected results, it is suggested that you assign all the constraints with Target position then click on the preview button (  ) to see if you get a clean shape. Complete the selection of the 3 Preserving Curves and 2 Matching Curves (as shown here) and click the preview icon.
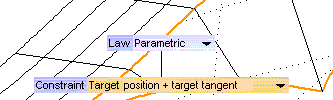
If you want tangency, change the constraints one by one and preview with each change to monitor your progress. Working this way, you can forecast the final results. You could even use a Matching Curves constraint on the 3 Preserving Curves. Depending on your conditions, you may achieve better influence over the shape of the surface.
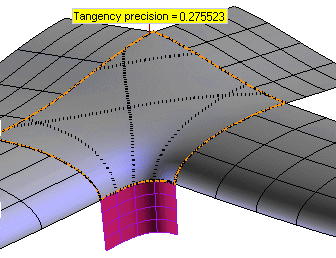
Here we have a good start but we see that when the surface doesn't match our precision tolerance we are warned that we aren't within our tolerance and the actual precision is displayed: 
There are many options available within the GSM command to help us improve precision. The Shape Control and Precision option settings can help us achieve higher tolerances. See Checking your results for further details about these options.