Creating an Angular Ordinate dimension

1  When you start the Ordinate dimension command, first set the Dimension Type as Angular. Then set the Origin by clicking on any of the snap points.

2 The Origin will be the reference point for the dimensions, that can be changed at any point using the Edit Reference option, provided below More Options. Click on the entity or snap point to create the dimensions.

3 The dimension is displayed as soon as you click on the snap point or the entity. Click to place the dimension in the desired location.

Note
If you select the entity, you will also get the dimension measure from the Origin. But if you select the snap point, you will see the dimension measure of just that snap point.


4

By clicking on the successive snap points or the entities, successive dimensions will be created. If the Aligned check box, under More Options, is selected, then the dimensions created will be aligned to each other. Otherwise you can place them by choosing the location individually.
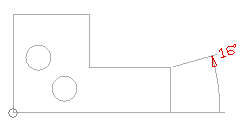
5 Before creating the dimensions you can set the direction for them using the Direction drop-down list, available under More Options. The three options available are:

Automatic While creating angular dimension using Ordinate dimension command, the Automatic option behaves as the one Along X-axis.
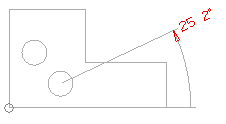
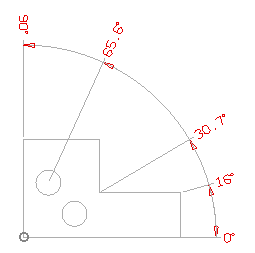
Along X-axis Angles are measured and created with respect to the X-axis
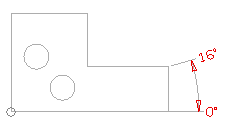

Along Y-axis Angles are measured and created with respect to the Y-axis
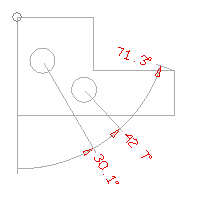
6 When you are finished creating the dimensions, end the command.

Tips and Tricks