You can follow the easy steps of this example to see how to create a circular helix curve, which can be either cylindrical or conical. Before starting, open sample file "CreateHelix.e3".
| 1 |
Start the Helix Curve command. |
| 2 |
In the Type drop-down list select
Axis and point. |
| 3 |
Check that the Rotation drop-down list is set to
Clockwise. If it isn't, set it to
Clockwise. |
| 4 |
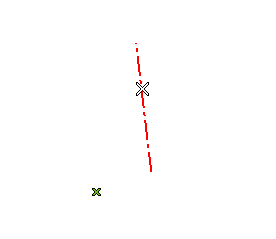
In the Axis drop-down list, select
Line (see "How to define an axis or a line). Then select the line.
|
| 5 |
Select the start point for the helix curve.
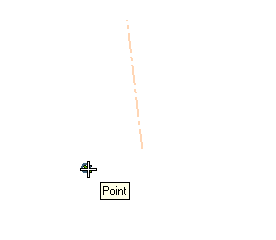
A preview of the helix curve is displayed.
|
| 6 |
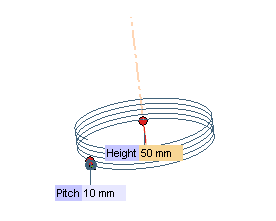
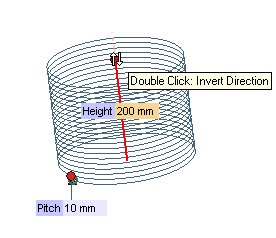
Drag the Height handle to the desired location or type in the corresponding value.
|
| 7 |
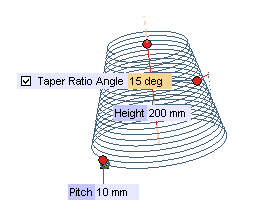
Expand the More Options node. The
Taper Ratio Angle check box will be displayed. Check the box and type the desired taper angle value in the adjacent box immediately shown up.
|
| 8 |
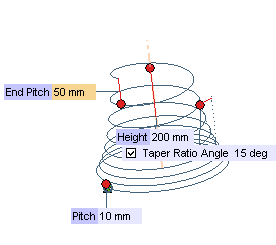
Make the pitch variable by selecting the Pitch law check box. In the adjacent drop-down list, select
Quadratic to have the pitch vary according to a quadratic law from the initial value (
Pitch) to the final one (
End Pitch) that you will specify.
|
| 9 |
In order to obtain a high quality resulting curve (higher internal continuity and degree), select the High Quality Approximation box.
|
| 10 |
Click  or or  to confirm your selections and create the curve. to confirm your selections and create the curve.
By right-clicking on the curve and selecting  , you can check that, having selected the
High Quality Approximation box, the degree of the resulting curve is 9 and its continuity is 4.
, you can check that, having selected the
High Quality Approximation box, the degree of the resulting curve is 9 and its continuity is 4. |