| Defining constraints on control points and applying them Note that at this stage you will just define the constraints you need to apply and select the control points you want to apply them to. When you're done with the definition of constraints, you will change the Mode to Move control points and you will see that the curve control points will be enabled to move only according to the constraints you have set. Please note the two options in the Mode drop-down list of the Curve through Control Points command: 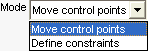 Move control points and Define constraints options are mutually exclusive. For this reason, the Selection List of the curve or surface is hidden when the Define constraints mode is set, while constraint options are hidden when the set option is Move control points. |
For details on how to control the distribution of motion for control points, see Using the Distribution law options.
| Reference entity management When defining constraints, you will typically use reference objects, such as lines, planes, curves or surfaces or curves. If the object you use as a reference is an active object (i.e.: an object selected among the ones to be edited), the Static check box will show up. If you check it, the shape of the reference object (from now on: the shadow) to be used is the one it had at the time it was selected. If the Static box is not checked, on the contrary, the reference object will be updated based on its current shape. So the meaning of static is to use a static representation of the object during the editing operations. |
| Parallel to axis | The selected Points will be constrained to move in a direction parallel to that of a selected Axis (see How to define an axis or line). | 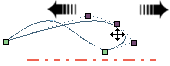 |
| On to axis | The selected Points will be constrained to move on a selected Axis. | 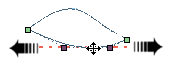 |
| Parallel to plane | The selected Points will be constrained to move on a plane parallel to the one you can specify as:
|
 |
| On to plane | The selected Points will be constrained to move on the selected plane (which can be specified as described for the Parallel to plane option). |  |
| Orthogonal to plane | The selected Points will be constrained to move on a plane orthogonal to the selected one (which can be specified as described for the Parallel to plane option). |  |
| Parallel to curve | The selected Points will be constrained to move keeping parallel to a selected curve. | 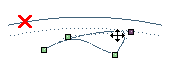 |
| On to curve | The selected Points will be constrained to move on a selected curve. |  |
| Orthogonal to curve | The selected Points will be constrained to move orthogonally to a selected curve. |  |
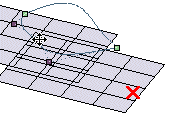
| Parallel to surface | The selected Points will be constrained to move keeping parallel to a selected surface. |  |
| On to surface | The selected Points will be constrained to move on a selected surface. |  |
| Orthogonal to surface | The selected Points will be constrained to move orthogonally to a selected surface. |  |
| Radial to point | The selected Points will be constrained to move radially about a selected Radial origin. |  |
| Radial to axis | The selected Points will be constrained to move radially about a selected Axis. |  |
| Constraint groups Any time you complete the definition of constraints for the selected control points, a further Constraint group shows up in the selection list to enable you to select another set of control points to which you can apply different constraints. |
| Snap to Markers When the Snap to Markers check box under More Options is selected, you will be enabled to move a control point snapping it exactly to another one, which is not possible when the check box is not selected. |