


Insert Surface
 Helix
Helix
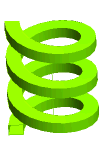
The Helix Surface command enables you to create helical surfaces by sweeping existing curves (open or closed) along a helical path (see "Circular Helix" for details on this definition), providing you with different construction modes.
In fact you can specify the pitch and the height, the pitch and the number of revolutions or the height and the number of revolutions.
The radius and the pitch of the helix surface can be made variable according to a linear or quadratic law, while a start and an end angle with respect to the initial position of the base curves can also be specified.
Associativity is also available (see "Associative Surfaces (Skins)" for details). When it is enabled, while you can select one single curve chain, the result will be just one skin solid with as many faces as the number of complete turns of the helix. In non-associative mode, on the contrary, you will obtain as many NURBS surfaces as the number of turns, though there is curvature continuity along each common boundary.
End caps can be created so as to close the helix, thus obtaining a closed solid in case the associativity mode is enabled.
Finally, you can create the axis of the helix as a datum axis entity.
After starting the command, you can proceed as follows:
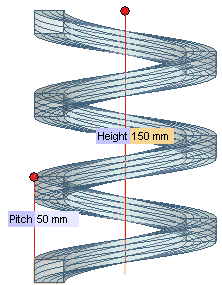
| Pitch and height |
To define the helix through its pitch and its height. Provide the values in the Pitch and Height boxes respectively, or drag the corresponding handles as desired. The direction of the helix can be inverted by double-clicking on the red handle displayed on top of the axis. |
 |
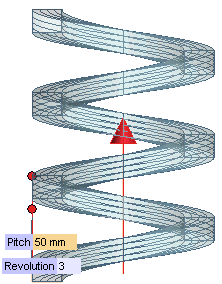
| Pitch and revolutions | To define the helix through its pitch and its number of turns. Provide the values in the Pitch and Revolution boxes respectively, or drag the corresponding handles as desired. The direction of the helix can be inverted by double-clicking on the red arrow displayed when this mode is selected. |
 |
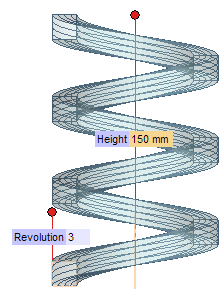
| Height and revolutions | To define the helix through its height and its number of turns. Provide the values in the Height and Revolution boxes respectively, or drag the corresponding handles as desired. The direction of the helix can be inverted by double-clicking on the red handle displayed on top of the axis. |
 |
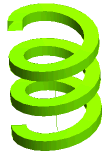
| Clockwise The helix will be created by sweeping the base curves in a clockwise direction about the selected axis. |
 |
| Counter-clockwise The helix will be created by sweeping the base curves in a counterclockwise direction about the selected axis. |
 |
 |
When the check box is selected, while you can select one single curve chain, the result will be a unique skin with as many faces as the number of the helix turns. It will retain a link to the entities it derives from. A specific node displaying both the original entities and the resulting skin will be added to the Model Structure. |  |
| Selecting non-associative entities If you select non-associative base curves, a message will be displayed to warn you non-associative entities have been selected and that they will become the root of the structure. |
 |
When the check box is cleared, the resulting surfaces will not be associative: they will retain no link to the curves they derive from. There will be a surface for each turn of the helix though there is curvature continuity along the common borders. |
 |
When the box is cleared the helix surface will have no taper angle (it will be cylindrical) | 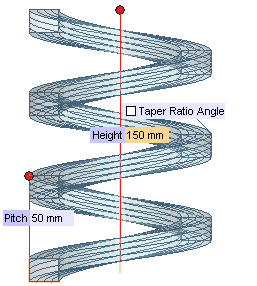 |
 |
When the box is checked, you can type the value of the taper angle inside the adjacent box, so as to obtain a conical helix surface. | 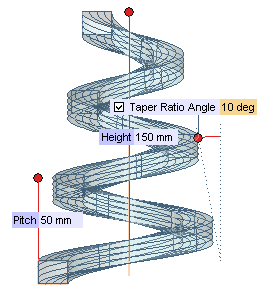 |
| None | No end caps will be created. |
| First | Only the initial end cap will be created. |
| Second | Only the final end cap will be created. |
| Both | Both the initial and the final end caps will be created. |
Note that all the mini-dialog boxes displayed on checking the following boxes can be displayed/hidden by expanding/collapsing the corresponding nodes.
Finally, if you are creating a skin, you can also create a datum axis entity on the axis of the helix. In fact, the Axis check box enables you to choose whether to create a datum axis corresponding to the axis of the helix or not. This option is available only in associative mode ( Associative Mode box checked).
| Associative Mode and driving dimensions Please note that in case you create a skin (by checking the Associative Mode box), a driving dimension will be associated to each of the values you used to define the helicoid solid, which is then completely parametric.
|