

Among the actions you can carry out by the Organize command, you can add a user provided Light Representation.
| Note that to add a standard Light Representation, currently not available for the selected component, you need to set the component to the Full Detail Light Representation, then you can apply to it the required Light Representation by selecting the specific command. The Light Representation will be added automatically in the list of the representations currently available for the component shown in the Organize Light Representations dialog box. |
Proceed as follows.
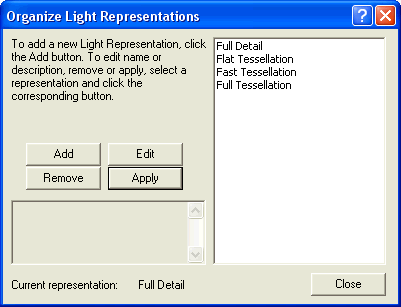
| 1 | Once you've selected an X-Reference component in Light Representation, perform the Organize command. The Organize Light Representations dialog box is displayed.
|
| 2 | Click the Add button. |
| 3 | The Open Light Representation file selection box is displayed. Select a model to be used in place of the component as a Light Representation and confirm by Open. |
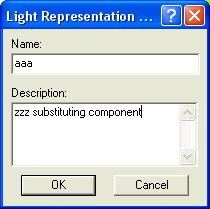
| 4 | The Light Representation Data dialog box is displayed. In the Name box, type a name associated to the custom Light Representation you are adding to the selected component. You can also insert a description in Description box.
|
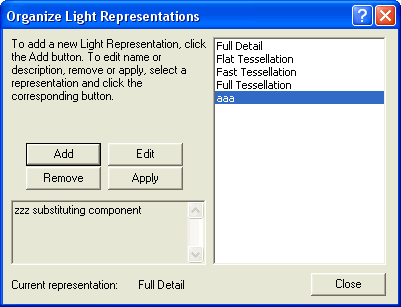
| 5 | As soon as you confirm by OK, the new user provided Light Representation will be included in the list of the Light Representations currently available for the selected component.
|
| 6 | You can now Edit, Remove, Apply the new Light Representation by clicking the specific button, arrange any other representation or simply close the dialog box and end the command by clicking the Close button. |
| Note that the procedure above described from step 3 to step 4 also applies to the New command. In actual fact, also the New command displays the Open Light Representation and Light Representation Data dialog boxes. The only difference from the Add tool within the Organize command is that when you confirm by OK in the Light Representation Data dialog box, the New command adds and applies the new user provided Light Representation. |