Inserting a V-Butt welding bead
In this task you will use the Weldings command to add the section of a V-Butt (or V-Groove) weld to a drawing and the relevant welding bead. To follow this step-by-step example, load the Weld_Vbutt.e2 drawing.
Before you start, check that the welding standard set in the Organize Weldings dialog box suits your needs, then familiarize with the scenario: you have two parts to weld together with a V-Butt weld:

| 1 |
Use the Welding Section command to create the section of the weld with the following options:
- Basic Symbol:
Single-V butt
- Format:
Single
- Metal Thickness: Checked
Select the origin (1) and initial depth (2) of the weld in the from view:

Enter the following values:
- Metal Thickness: 10
- Different sides: 15
Finally, click the  to create the weld: to create the weld:

Look for more information on this subject in Inserting a fillet welding section.
| Before you move to the next step, open the front view so you will be able to select the welding section you just created. |
|
| |
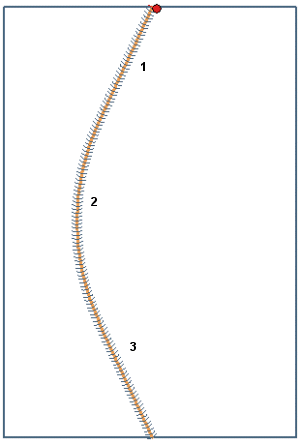
| 2 |
Start the Welding Bead command and select the three curves in the top view:
|
| |
| 3 |
Click Data from Welding and select the welding section you previously created. Note how the program reads from the existing weld the
Basic Symbol and the
Different sides. |
| |
| 4 |
Set the following options:
- Intermittent bead: Checked
- Segment length: 30
- Spacing: 20
 |
| |
| 5 |
Click the to create the welding bead.
 |