Creating a new toolbar from the default program toolbar
The Customize dialog box provides access to the program's toolbars. You can use it to copy buttons from one toolbar to another that may already exist (for example, see Creating a new “empty” toolbar), or that may be created automatically as described below.
To create a new toolbar from a default program toolbar, do the following.
- Open the Commands tab of the Customize dialog box by selecting Tools
 Customize from the menu bar.
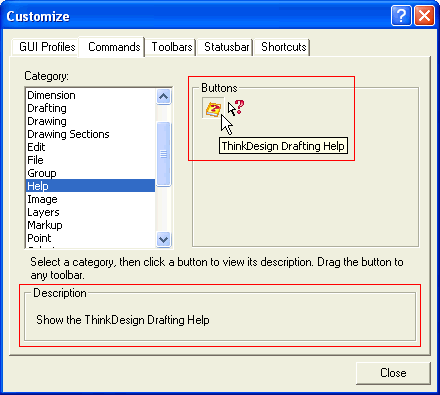
- Select a toolbar from the list under the Category: area, as shown in the image below. The buttons of the selected toolbar are displayed under the Buttons area on the right.
Tip: If you don't know the usage of a particular button, just click on it; the description of the button appears in the Description box.

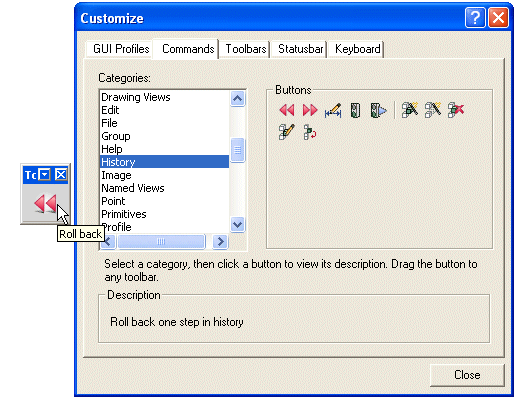
- Move the mouse pointer over the button to be copied and press & hold down the mouse selection button.
- Now, drag the button into the graphics area.
- Let go the mouse selection button. The program automatically creates a new toolbar (called “Toolbar #”, where # is a sequence number starting from 0) containing only the button you have just copied from the existing toolbar.
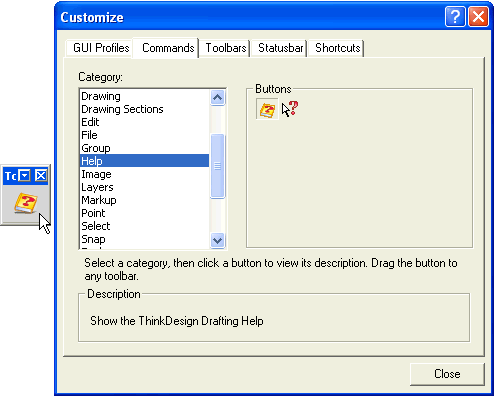
You can now modify this toolbar with the toolbar customization functions.