Creating Surfaces along a Drive Contour and Tangent to Some Surface Drives
In this example you will use the Drafter command to create surfaces along a drive contour and tangent to some other surfaces used as drives. It can be used to add a draft angle to casting and forging parts. You can load file "Drafter.e3":
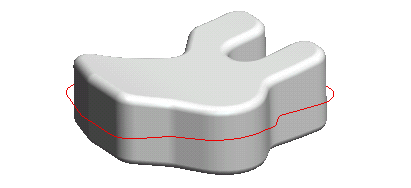
You need to add a draft angle along the Y axis. The drafting surfaces will be created along the red contour laying on the Parting plane and tangent to the fillet surface.

And here is the result the Drafter command will enable you to obtain:

In the end, you can obviously integrate the resulting surfaces in the original model, so as to actually reach your initial goal.
| 1 |
Start the Drafter command. |
| 2 |
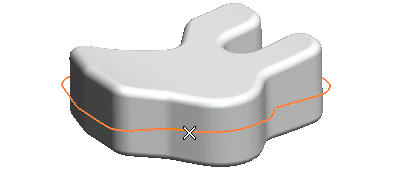
Select the drive contour (First Drive Curves). This is the contour the drafting surfaces are to be through. Note that the contour has to contain only one chain of curves: any number of at least positionally continuous (G0) curves. You can right-click and use the  command from the context menu to select the whole contour with just one click. command from the context menu to select the whole contour with just one click.
|
| 3 |
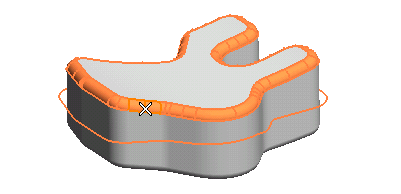
Then select the drive surfaces (Second Drive Surfaces), that is a set of surfaces with which the resulting drafting surfaces will be tangent.
|
| 4 |
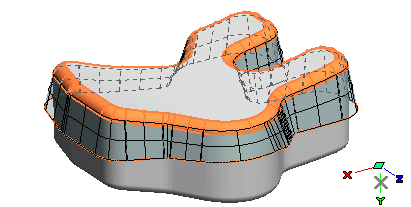
Finally, select the drafting direction (Direction — for details on the definition of a direction, see "How to define an axis or a line" in the online documentation). In this case, select the direction of the Y axis of the Work Plane (choose Line in the drop-down list and then click on the symbol of the Y axis of the Work Plane in the model). And here is what you get when you ask for the preview (  ). ).
 |
Repeat the steps above for the lower chain of drive surfaces to obtain the result shown in the image on top of this document.