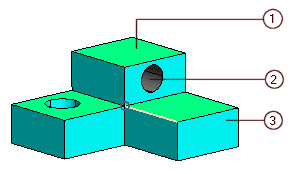
The Region Analysis command enables you to analyze a mold part. This analysis provides the base for alternate method for creating the core and cavity in the MoldDesign module. You can identify and classify the faces as regions of the mold part as core, cavity or slider. This process minimizes the effort in identifying the core and cavity faces and gives you more control on the mold part. The faces can be converted to skin using this command. The skins will be used in creating the core and cavity using the Region based option in the Split Mold command. The following are the functionalities of the Region Analysis options in the selection list.
The direction is one of the most important criteria for analysis. The direction of the extraction of the mold part will determine the result of the analysis. You can have multiple region analysis by selecting different extraction directions.
On starting the Region Analysis command, the mold part is selected for the Solid selector in the selection list. Under the Directions node, you can enter a name in the Directions text box, else the application itself names each analysis as Direction 1, Direction 2 etc. The analysis is based on the selection of the extraction direction. Each direction analysis can be named as per your requirement using the Directions text box. Then select the extraction direction using the Direction drop-down list.
Once the analysis of the mold part has been done by selecting a specific direction, then two buttons are available for selection.
Using the New Direction button, you can analyze the mold part based on a new direction of extraction. This multiple direction analysis can be done in a single working session of the command.
The Local check box enables you to view a basic or detailed analysis of the mold part. The analysis results in the faces classified with different regions represented by specific colors.
 |
|
 button. You can toggle the button to on or off to see the selected classified surfaces. The following is an example of detailed analysis.
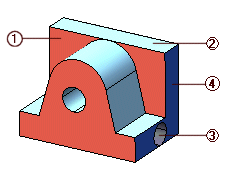 |
|
| Note The Outside box and Outside box (partially) is displayed only when you select the Inside box check box and define a box area for analysis on the mold part. |
The color displayed on the faces can be customized by clicking on the Color button. The color of your choice can be selected from the color palette.
The Check face classification and Manual face classification check boxes enable you to view the different faces grouped and you can manually change the classification of the faces as per your requirement.
| Note: These face classification check boxes are available only when the Local check box is not selected. |
When selected, the corresponding drop-down list is activated listing all the face classification. The Face selector with the Previous and Next buttons are available to view each face one by one.
For Example: In the Check face classification drop-down list, select Visible (mold part). Then the first face of the visible faces will be highlighted on the mold part. Then click on the Next button to view the next face. If necessary, you can also click the Previous button to view the previous face. Using the Face selector, you can select the face on the mold part and then view the next faces by clicking the Next and Previous buttons.
When selected, then the corresponding drop-down list with the all the face classification is displayed. You can also manually classify the faces using the Additional faces selector.
For Example: The Visible (mold part) is selected in the Manual face classification drop-down list. Select the Additional faces selector and select a face which does not indicate the Visible (mold part) faces. On selecting that face, it is classified as Visible (mold part), which is indicated by the change in color.
This enables you view the faces of a region that is not a continous. When selected, you can view the different regions in using the Next  Previous buttons. The number of multishells present in the current analysis is displayed in numarical corresponding to the Check multishell skin check box.
The regions provide the list of regions analyzed in the mold part. The list is the names given in the Directions drop-down list. This only highlights the faces under the Visible (mold part), with the option to change the color representation using the Color dialog box. The No. faces out of regions displays the number of faces that is not classified as Visible (mold part). Also the numerical figure of the faces under classification is displayed.
The Create skins check box is used to create the skin of the Visible (mold part) region.
The following is an example of the skin created of the Visible (mold part) faces.
 |
 |