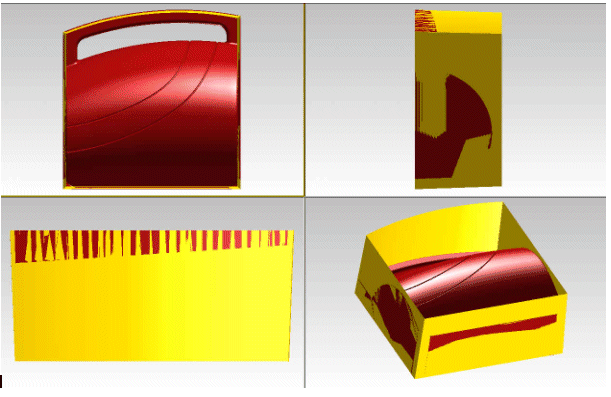
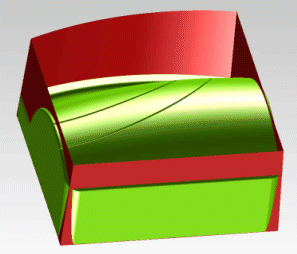
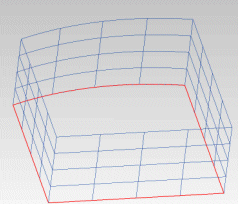
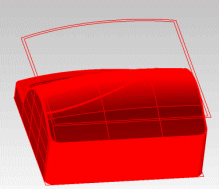
Create the vertical Linear Sweep surfaces — the blue ones — with no draft angle, just a little higher than the model. They are coincident with the bounding box of the model. Do not create the surfaces from the fillets on the edges.
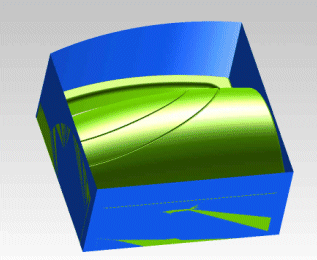
Create linear sweep surfaces — the red ones — with a draft angle, with the same length as the blue surfaces. Make sure the draft angle is not too big for the actual model, in order to avoid intersections on the top.
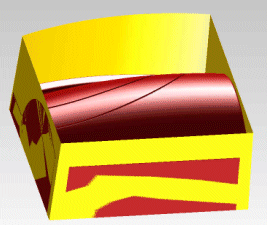
| Tip: Create all surfaces on different layers. For example: Model layer 1, blue surfaces layer 2, red surfaces layer 3. Than you can make the needed layer visible at any moment while the command is active. |
Why do we need these two sets of surfaces? We are going to define a "transformation" using very simple "auxiliary" surfaces. Then we will apply this transformation to the actual surfaces (part).
Group 1
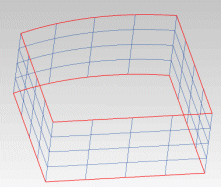
- Initial curves: Select the boundaries of all blue surfaces on the bottom.
Tip:
Start from one surface and keep going in one direction (clockwise or counter-clockwise)
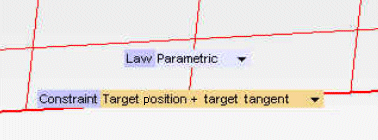
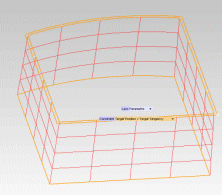
- Target curves: Select the boundaries of all red surfaces on the bottom. Set the constraint to Target position + target tangent.
Tip:
Start from one surface and keep going in one direction (clockwise or counter-clockwise) At the end of the selection the Constraint drop-down list will be displayed. If doesn't show up, this means you have selected something wrong or there might be a gap between the surfaces.
- Initial curves: Select the boundaries of all blue surfaces on the top.
Tip:
Start from one surface and keep going in one direction (clockwise or counter-clockwise)
- Target curves: Select the boundaries of all red surfaces on the top. Set the constraint to Target position + target tangent.
Tip:
Start from one surface and keep going in one direction (clockwise or counter-clockwise) At the end of the selection the Constraint drop-down list will be displayed. If doesn't show up, this means you have selected something wrong or there might be a gap between the surfaces.
 ).
).
|