Introduction to the Drawing Environment
 e-Learning Material: e-Learning Material:
A friendly set of e-Tutorial videos on drawing and layout has been created and is available on the Customer Care Corporate site (e-Learning home page). Take a look at the list of the available educational videos on drawing and layout here: e-Learning: Drawing Environment and Layout.
Enjoy your lessons! |
What is a Drawing?
A drawing is a two-dimensional representation of a 3D object. In our application, you can create drawings two different ways:
You can also associate project information with the drawing in different ways. The methods available depend on whether the drawing is associated with a 3D model.
Drawings associated with 3D models
The program can automatically create two-dimensional drawings from a 3D model. For example, if you currently have a 3D model opened in the application, when you begin to create a new document, the program asks whether you want to create a new model, a new drawing, or a new drawing from the current model. If you create a new drawing from the current model, the program displays the Layout Configuration dialog box, in which you can select an existing configuration and use it to automatically create the two-dimensional drawings of the model.
You can also create a new drawing or open an existing drawing and then automatically create two-dimensional views from any existing 3D model by specifying the reference model. If you open an existing drawing, you can automatically open its reference model by using the Open Reference Model command.
When you create two-dimensional drawings in this way, you can create a single predefined view, a custom view, or all of the views defined in the current layout configuration.
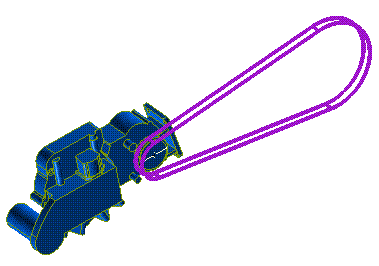
For example, from the three-dimensional model shown below

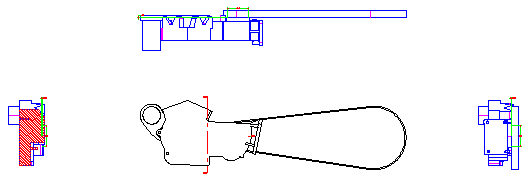
you can create the following top, front, side, and section views.

You can also create views based on a Visual Bookmark defined in the referenced model (using the Custom Visual Bookmark command).
You can easily save your current view arrangement as a configuration (by using the Save Layout Configuration command). You can then apply that configuration (by using the Load Layout Configuration command) to create a drawing of a different three-dimensional model consisting of the same arrangement of views.
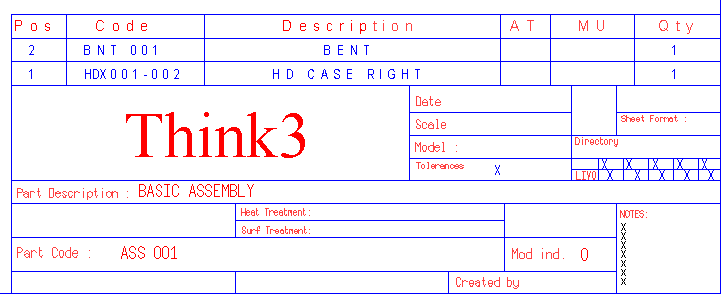
With the reference information added to your drawing, you can automatically produce a part list or bill of materials (by using the Tools Part Lists command), similar to the one shown in the following illustration.

Drawing not associated with any 3D model
All the tools which are available in the program's Model environment—except those that don't make sense when working in a two-dimensional environment—are also available in the Drawing environment. You can use those tools to create two-dimensional drawings that are not connected to any model. For example, you can easily insert curves, points, text, lines, arcs, and so on to draw 2D objects.
When you draw directly in the Drawing environment, you can use Groups to assign project data using the same methods used as when you assign data to the components of an assembly. You can therefore add parts lists and ballooned item references to 2D drawings that you create the same as when working with drawings associated with a 3D model.
When you create a drawing not associated with a model, you can use groups to organize your drawing into a similar hierarchical structure.
 e-Learning on the Drawing Environment
 e-Learning on Layout
 e-Learning Material: