| 1 |
Create a new drawing by using the File  New New  Drawing command (if you haven't already done so). Drawing command (if you haven't already done so). |
| 2 |
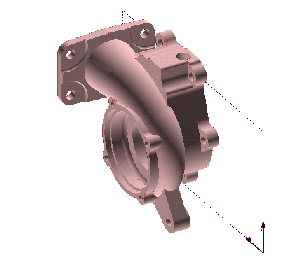
From the menu, select the type of predefined view you want to insert (Insert Drawing Views Drawing Views Main Main Top, Front, Left, Right, Rear, Bottom, Right Back, Left Back, Left Front, or Right Front; see Predefined views). For example, this illustration shows a typical 3D model. Top, Front, Left, Right, Rear, Bottom, Right Back, Left Back, Left Front, or Right Front; see Predefined views). For example, this illustration shows a typical 3D model.

You could therefore insert any of the following predefined views:
| Top |
Front |
Left |
 |
 |
 |
| Right |
Rear |
Bottom |
 |
 |
 |
| Right Back |
Left Back |
Left Front |
 |
 |
 |
| Right Front |
 |
|
| 3 |
The first time you insert a view into a new empty drawing, the program displays the Referenced Model dialog box. Select the model from which you want to create the view, and then click OK. |
| 4 |
As soon as you specify the model, the program quickly calculates the view and displays a preview image of the view, attached to the cursor. |
| 5 |
The program prompts you to enter the view origin. Click to position the view. After inserting the view, you may want to specify a suitable format for the drawing sheet, insert a border and title block, and then insert other views (such as projected, auxiliary, detail, cross-section, sectioned, developed, or exploded views). |
 New
New  Drawing command (if you haven't already done so).
 Drawing Views
 Main
Main Top, Front, Left, Right, Rear, Bottom, Right Back, Left Back, Left Front, or Right Front; see Predefined views). For example, this illustration shows a typical 3D model.


