Create dimensions between snap points
| 1 |
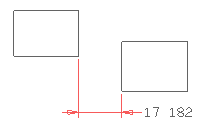
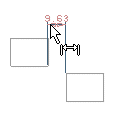
When you start the Smart Dimension command, the program prompts you to select an entity. Click to select an entity or edge at a Snap point.
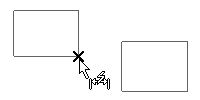
The Snap point option in the Type drop-down list is automatically selected.
|
| 2 |
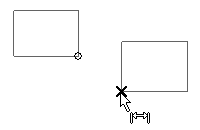
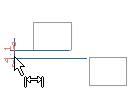
You are prompted to select a special point. Click to select another Snap point.
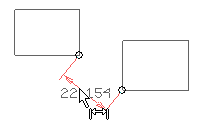
 Notice that the program immediately displays the dimension, which moves as you move the cursor. By default, the dimension will be along the direction identified by the two special points, representing the Distance Orientation option.
|
| 3 |
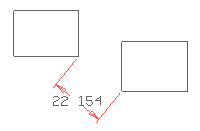
To create the dimension, simply specify the location of the dimension line.
|
Prior to creating the dimension, you can change the orientation of the dimension line by selecting one of the following from the Orientation drop-down list:
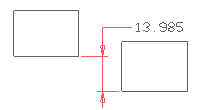
Distance
measures and creates the dimension along the direction identified by the two special points
|
 |
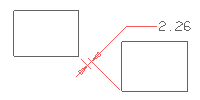
Horizontalmeasures and creates the dimension parallel to the X-axis |
 |
Verticalmeasures and creates the dimension parallel to the Y-axis |
 |
Projectedmeasures and creates the dimension at a specified angle. When you choose this option, the Angle mini-dialog box is displayed, so that you can set the dimension line angle (which is measured counter-clockwise in relation to the X-axis). |
 |
Automaticmeasures and creates the dimension parallel to the line through the two special points chosen or parallel to either the X-axis or the Y-axis(which are shown in the images in that order) |
   |
Format
Using the Format option you can create the dimensions in any desired format.
Properties
By clicking on the Properties Option, the Entity Properties window shows up, that enables you to control appearance of the Dimension and Text entities.