Proceed as described in the steps below.
In this example you will create a cutting line using the Cutting Line command. Load file "KiteWings.e3".
Proceed as described in the steps below.
| 1 | Start the Cutting Line command. |
| 2 | Select the curves that will be used as a pivot for the development of the curves of the wing contour and end selection. The Pivot Curves item in the selection list will turn to green.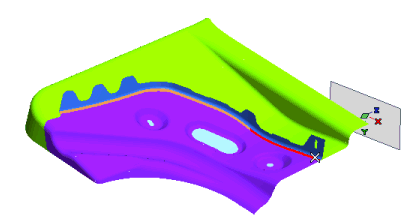 |
| 3 | Set the Drive Curve drop-down list to Pivot. |
| 4 | Select the wing contour, that is the curves that will be developed. End selection: the Contour item in the selection list will turn to green.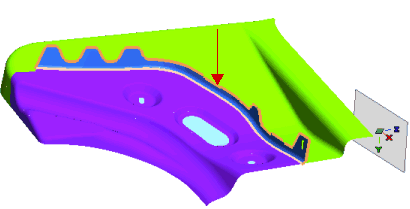 |
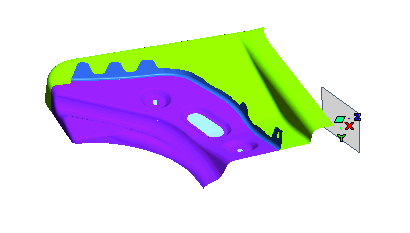
| 5 | In the Start Entities drop-down list choose Surfaces and then select the surfaces as shown in the image below: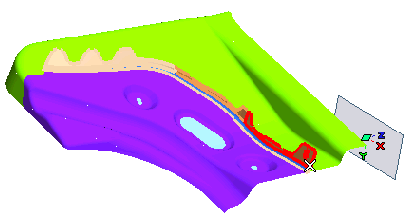 End selection. |
| 6 | In the End Entities drop-down list choose Surfaces and then select the surfaces as shown in the image below: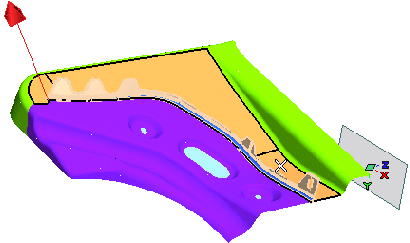 End selection. |
| 7 | The Preview button (  ) shows up on top of the selection list and is available to assess the result: ) shows up on top of the selection list and is available to assess the result: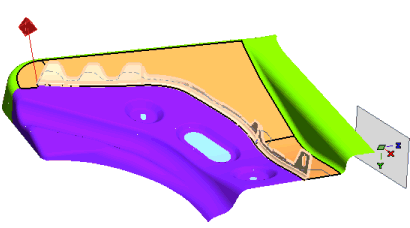 |
| 8 | Expand the More Options node and select the Show Section Planes check box in order to display the actual planes used in the computation. The preview will change: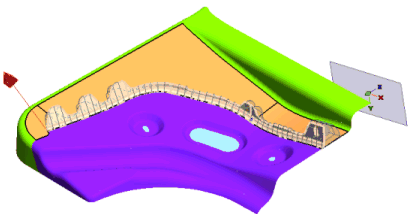 |
| 9 | Click  or or  to confirm your selections and create the curve. to confirm your selections and create the curve. As you can see, the cutting line has been created. |