The Make Flexible option is used to exploit the degrees of freedom available in the subassemblies. Open the Flexible.e3 file available in the Samples folder of your installation location and follow the steps given below.
The assembly contains two subassemblies.
Wheel-asy: The Wheel (pink in color) is mounted on its Stand (brown in color). The Wheel is free to rotate on the mounting.
Slider-asy: The Slider (blue in color) is mounted on its Stand (brown in color). The Slider is free to slide along the guide way.
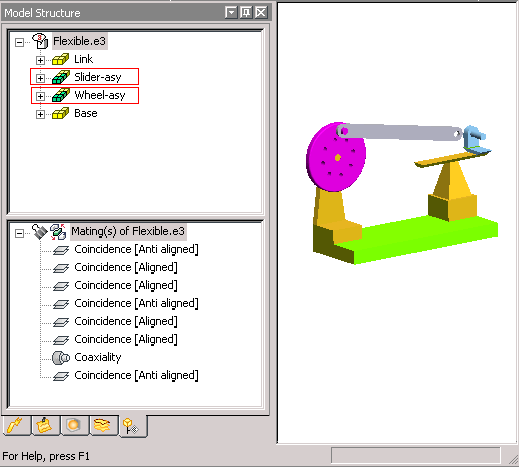
A Coaxiality constraint is already applied between the hole in the Link Rod (gray in color) and the pin on the Wheel.
The Link Rod should also be mated with the Slider to complete the assembly. Since the subassemblies behave as a rigid component in a assembly, applying a Coaxiality constraint between the hole in the Link rod and the pin on the Slider is not possible.
Make the subassemblies flexible by right-clicking on them in the Model Structure or in the Graphics Area and selecting the Make Flexible option.
Apply the Coaxiality constraint between the hole in the Link Rod and the pin on the Slider. The software automatically finds the exact position of the movable parts to successfully apply the constraint.
The assembly becomes complete with the Slider and the Link Rod mated with each other.
Note
The flexibility of the subassembly can be disabled by selecting the Make Rigid option displayed by right-clicking on it in the Model Structure or in the Graphics Area.
Making rigid a subassembly to which some constraints are already applied while in a flexible state may cause the mating not to solve anymore. In such situations a warning is displayed informing you about the issue.