Document Explorer
The History Tree area (see What is Model History) is a flexible GUI object window, which enables you to adapt it to your own needs needs.
From now on, wh shall call the window Document Explorer. It is completely integrated in the ThinkDesign document, using the same elements, such as Model Structure and Visual Bookmarks, called Tabs.
The following actions are the ones that you can apply to arrange the entire structure of the windows:
· Keep the Document Explorer window docked, as since the previous versions of ThinkDesign.
· Float both the entire Document Explorer window and each single tab pages over the screen.
· Hide both the entire Document Explorer and a single tab page.
· Pin the Document Explorer window either to the Left or to the Right document border.
· Reset the entire Document Explorer window content to the default layout.
How to manage the Document Explorer
By default now a ThinkDesign document is divided into two areas: the Graphics Area on the right, the Document Explorer area on the left.
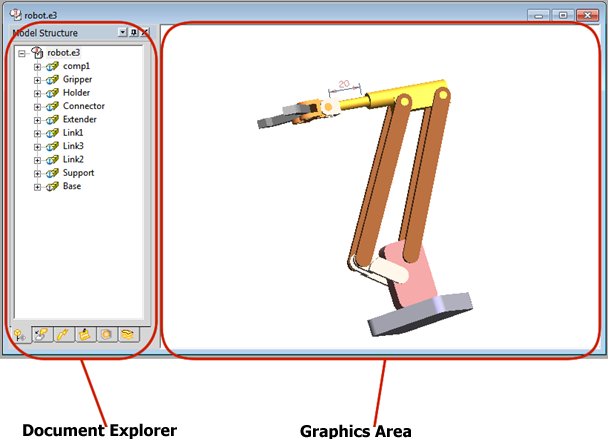
Fig. 1 – ThinkDesign document structure
The Document Explorer is a tabbed pager window and contains the following tabs:
· Model Structure, Visual Bookmarks, Annotations, Rendering and Layers are the ones available when opening a Model document
· Drawing Structure, Visual Bookmarks, Shared Group and Layers are the ones available when opening a Drawing document.
The new Document Explorer window is fixed by default to the opened document, as in previous versions. This mode is called "Docked".
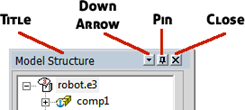
Some objects are available on the top window banner:
|
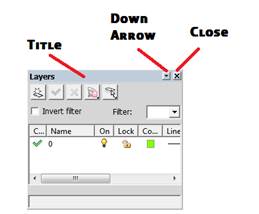
Fig. 2 – Document Explorer banner
|
· The Title, which is the name of the current tab · A Down Arrow button · A Pin button · A Close button.
|
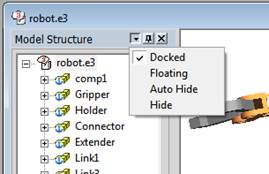
The Down Arrow button enables you to open a popup menu listing the view options that can be applied to the Document Explorer pager window.
|
Fig. 3 – Down Arrow popup options
|
· Docked:the pager window remains open when moving the cursor out of the window · Floatingthe pager window can be dragged anywhere onto the screen · Auto-Hide: the pager window closes automatically when moving the cursor out of it. This mode is available only for the Document Explorer pager window · Hide: this option switches the Document Explorer window off. See below how to unhide it.
|
So, you can dock, float, auto hide and hide the Document Explorer pager window selecting one of the above options.
The "Auto Hide" mode can be activated also by clicking the Pin button. The whole pager window will collapse into a vertical slider along the left border of the document.
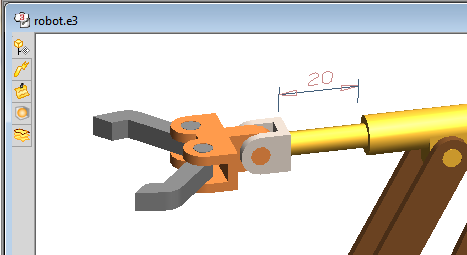
Fig. 4 – Auto Hide view mode
By default, the document left side border will be populated with icons, one for each visible single tab page. Moving the cursor onto one of the icons, the tab will show up and overlap the graphics area, without changing the area size.
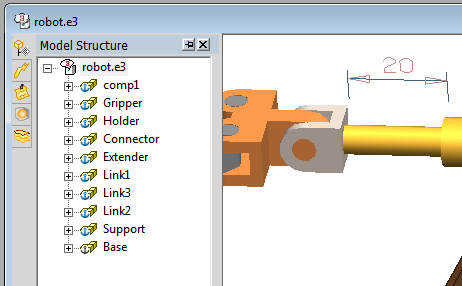
Fig. 5 – Tab page partially overlapping the graphics area
The Pin button enables switching between the Docked and the Auto Hide modes. The related icons show the currently enbled mode:
![]() Auto Hide
Auto Hide
![]() Docked
Docked
To Hide the Document Explorer window click the Close button.
By closing the Document Explorer, all the open docked tabs will be closed.
Users can undock the window of the Document Explorer and drag it anywhere onto the screen, by activating the Floating option. In this mode, the Pin button is not available.
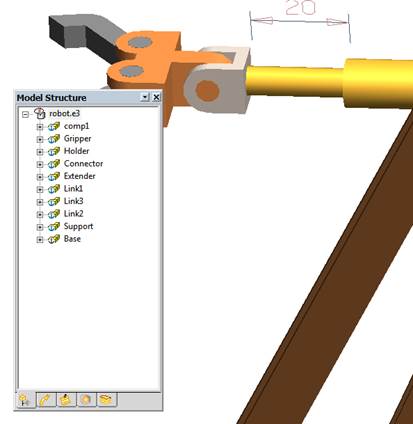
Fig. 6 – Floating mode
| NOTE To quickly switch between the Floating and the Docked options, move the cursor to any point on the Document Explorer banner and double-click the left mouse button. Note that the left double-click action is not available in the AutoHide mode. You can use either the left or the right side of the current document as the only parts where both the Docked and AutoHide states can work. |
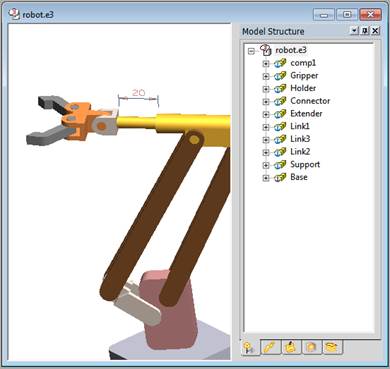
Fig. 7 – Pager window Docked on the right side
To dock the window of the Document Explorer to one of the document borders, you only need to enable the Floating option and release the mouse button when the desired document border has been reached.
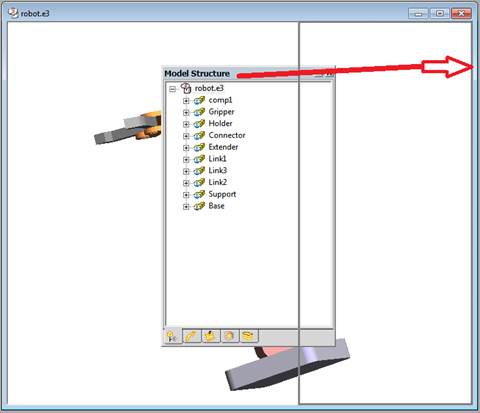
Fig. 8 – Drag the Document Explorer window to the document right border
| NOTE To move a floating window exactly where you want, without snapping it to a document border, hold down the <CTRL> key while dragging it. |
Working in AutoHide mode
Once opened, the selected single page remains open until the position of the mouse cursor is located inside the window.
All the actions that can be performed on a tab page in the Docked mode are available also when you work in AutoHide mode. For example, you can right-click to open the context menu and select a command, or left-click to select an entity.
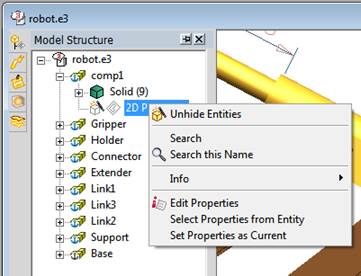
Fig. 9 – Context menu available for a tab in AutoHide mode
In AutoHide mode, to hide an open tab page you only need to select something outside the window.
| NOTE in AutoHide mode, it is impossible to resize each single tab horizontally. |
UnDock a Tab Page
As already explained, the pager window contains, by default, all the tab pages corresponding to the document types supported by ThinkDesign.
Now it is possible to undock the tab pages individually.
|
Fig. 10 – Options available for a tab page |
To do it, right-click the mouse button on the tab icon and select the Floating option in the popup menu which shows up. |
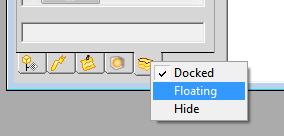
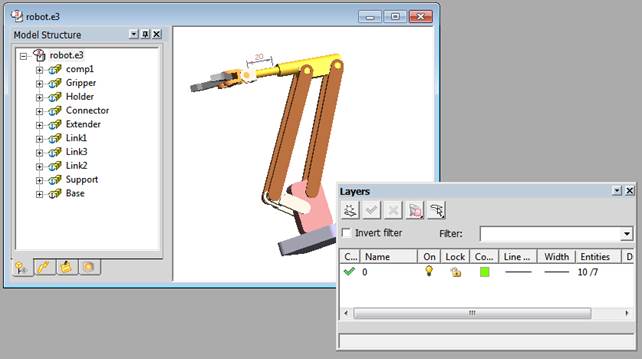
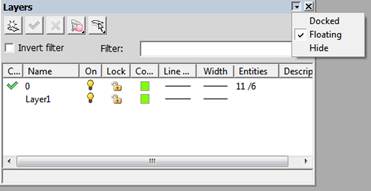
Fig. 11 – The Layers tab page in Floating mode
When a tab page is floating, its window contains a banner shows the Title (the name of the tab), a Down Arrow button and the Close button.
|
Fig. 12 – Banner of a floating tab page |
· The Title, which is the name of the current tab · A Down Arrow button · A Close button.
|
By clicking on the Down Arrow button, you can access a popup menu with the list of the available options. They are mutually exclusive. Select an option among the following:
|
|
· Docked: to dock the tab to the Document Explorer · Floating: to undock the tab and drag it anywhere onto the screen; · Hide: to close the tab. |
You can also Hide the tab page by clicking on the Close icon on the right top corner of its banner.
| TIPS To quickly undock a tab page from the Document Explorer, you can simply drag its icon anywhere onto the screen, or double click the icon and drag it. To dock it again, double-click on its banner. To resize the tab page, either horizontally or vertically, first set the Floating mode. |
How to manage Multiple Documents with the Document Explorer
The enhancements here introduced are particularly useful for managing more documents simultaneously.
When working with multiple documents and their visualization mode is not maximized, if the tabs and/or the pager are floating, a temporary configuration is forced: the tabs are integrated in the pager, and the pager itself is docked.
If one of the above conditions stops existing, the previous mode is restored.
In the situation of the image below, all the banner buttons (Down Arrow, Pin and Close) of the document window are not visible (disabled).
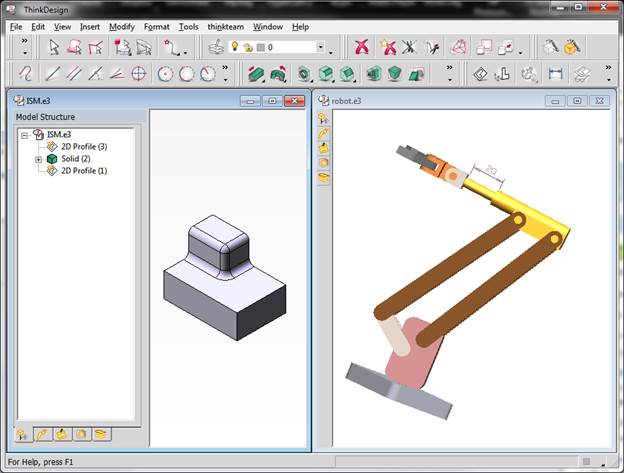
Fig. 14 – Multiple documents opened in a non-maximized visualization mode
F11 environment
In Full Screen mode (<F11> keyboard function), you can access the Document Explorer and/or its tabs only if they are in floating mode.
Save configuration
The
current view state location and size of the window of the Document Explorer and of all single tabs are automatically saved each time you close a document.
It is possible to save a configuration for each document type supported by ThinkDesign, which is mnodel or drawing.
When you open a new document, the saved configuration is automatically applied to it.
The configuration of the Document Explorer is managed according to the GUI Profile and takes effect each time you start the program..
The Document Explorer from the Menu Bar
Following the path View Document Explorer, you can access the list of the available tab pages. By selecting or deselecting the single items, you can view or hide them. A flag icon is used to show the view mode close to each corresponding item.
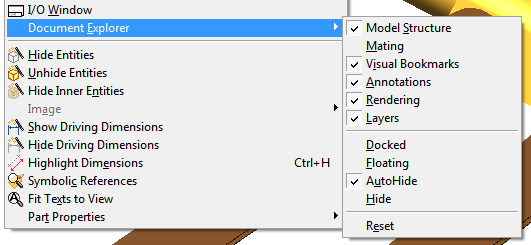
Fig. 15 - List of the tab pages currently available from ViewDocument Explorer
It’s also possible to change the view mode of the Document Explorer pager window, through the options available in the popup menu: Docked, Floating, AutoHide and Hide. A sign icon will be shown close to the selected mode.
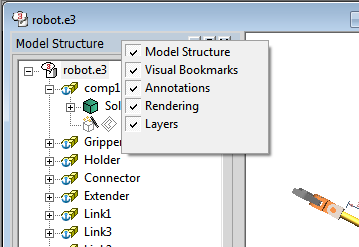
| TIPS As an alternative, to quickly check and change the view mode of the single tab pages, right-click on the banner of the Document Explorer window. A popup with the list of all the available pages will show up. |
Resetting the Document Explorer to the default layout
To restore the original docked mode of the Document Explorer window and all the tab pages, run the command ViewDocument ExplorerReset, then confirm the action by answering Yes in the message box which will show up.