To unhide the Cone, select the Unhide Entities command either from the View menu or the Attributes toolbar. Note that there is no need to set the component current before using the Unhide Entities command.
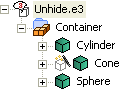
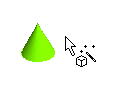
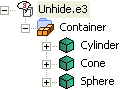
The following illustration explains the procedure of using the Unhide Entities command to unhide entities inside a component. We will use the following component for this illustration which has three bodies: Sphere, Cone and Cylinder.
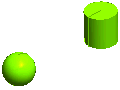
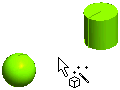
In the first case only the Cone is in the hidden state inside the component.
To unhide the Cone, select the Unhide Entities command either from the
View menu or the
Attributes toolbar. Note that there is no need to set the component current before using the
Unhide Entities command.
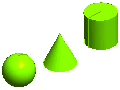
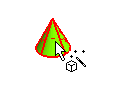
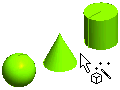
Once the command is started the graphics area goes blank. To view the entities that are hidden at the moment, select the Show All Hidden Entities option from the context menu displayed by right clicking in the graphics area. Now all the hidden entities will be displayed on the screen. Click on the Cone to unhide it.
The entities that you select to unhide are no longer displayed on the graphics area. Press the Esc key to return to the window where all the visible entities are displayed.
| Tip You can also unhide the Cone by right clicking on its name in the Model Structure and selecting the Unhide Entities option from the context menu. But by using the Show All Hidden Entities option, you can make a visual conformation of the entity prior to unhiding it. This visual inspection can come handy when multiple entities are in the hidden state and you are not familiar with their names as displayed in the Model Structure. |
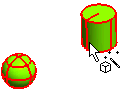
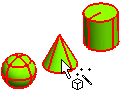
In the sencond case, not only the Cone but also the component in which it is present is in the hidden state. Different results will be obtained if the unhiding is done with or without using the Show All Hidden Entities option.
 |
 |
| Default | Show All Hidden Entities |
 |
 |
| Default | Show All Hidden Entities |
 |
 |
| Default | Show All Hidden Entities |
|
|
|
 |
| Default | Show All Hidden Entities |