Using the Proximity Radius, Manual Repair and Advanced Options
The following options are available under More Options in the Trim Surface with Limits command:
For a general description about the cases when these options can be useful, see "Trimming with healing".
Proximity Radius
The program looks for free end points in the chain. If it finds some, then it sorts them into groups based on a tolerance value depending on the Mode chosen under Proximity Radius.
| Automatic |
Any open gap between free endpoints will be automatically closed by the program if the distance between the points is small enough to make it reasonable — in most situations — for you to expect the two points to be considered coincident.
However, the tolerance used by the program — that is: the minimum distance under which the gap between two free endpoints will be closed — is the value corresponding to the Parameter Domain (%) you can set under Advanced Options. |
| Manual |
Only gaps where the points have a distance smaller than the Proximity Value from each other will be closed. Set the Proximity Value which best matches your needs depending on the specific situation. |
Manual Repair
There can be special cases where you might want to make a local repair of the work that the system has done. In this case the options in Manual Repair have been provided.
In the Mode drop-down list, you can select one of the following methods.
| Remove manual constraints |
Enables you to "cleanup" the constraints that you have imposed on the healing algorithm and later decided you don't want. Since the code remembers that you have made a special association between some free end points, the automatic (or system) healing ignores these points. By removing the association the system is allowed to include these points in the process again. |
| Ignore dead ends |
A free endpoint with a manual assignment is ignored by the automatic processing. This option enables you to specify that you want the system to ignore a particular free-end and process without it.
In the following model, for example, you have set a manual condition on the point indicated by the arrow, but now you have changed your mind and want to ignore it.
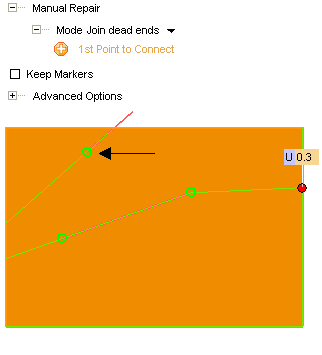
With this goal, you proceed as follows:
- Set Mode to Ignore dead ends. The Ignore selected dead ends item shows up in the selection list.
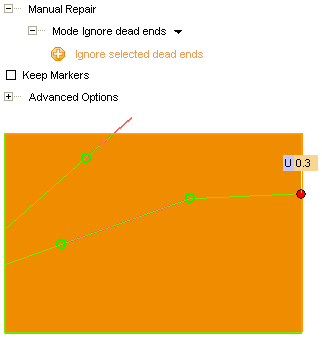
- Select the dead end you want the program to ignore.
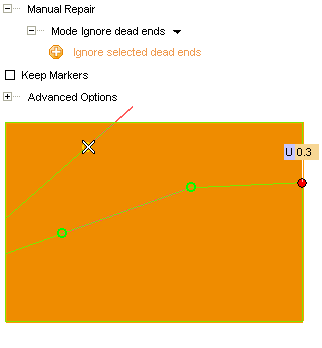
- Now select the region to be kept by clicking as shown in the following illustration.
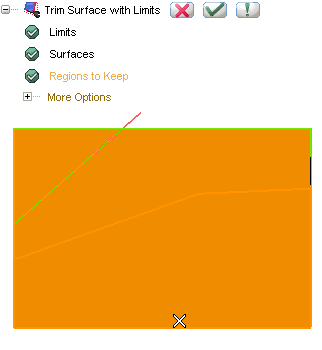
- If you apply the command, you will see the dead end you told the program to ignore has actually not been taken into account when trimming.
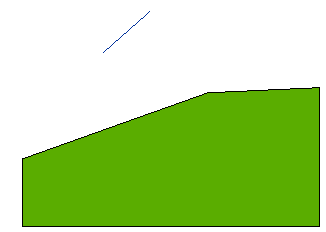
In general, therefore, the Ignore dead ends option can be useful when the automatic healing needs to be replaced by a special method (blend, etc.), or when there are say 3 free points in a particular area and rather than control how they can be joined based on tolerances, one is just to be ignored. |
| Join dead ends |
Enables you to simply make pair wise selections of 2 free-end points to associate with each other and thus force the system to close the selected gaps. Once you have selected this option:
- The 1st Point to Connect optional selector is displayed in the selection list. Click on the point to connect
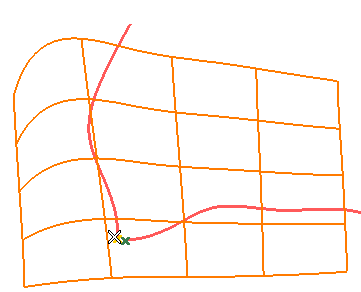
- Note that you can also force a connection to the surface boundary, by clicking Surface Boundary Edge to Connect in the selection list and then by selecting a surface edge:
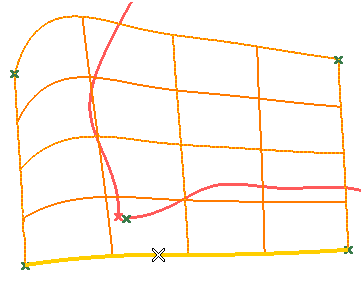
- Once the edge has been selected, the U mini-dialog box/handle pair is displayed on the surface edge, enabling you to move the connection point along the surface boundary either by interactively dragging the handle or by supplying the parameter value corresponding to the point to be connected.
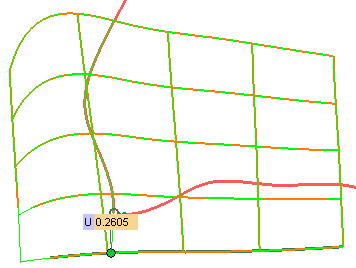
- You can control the way the connection is created by choosing the proper option in the Fill Gap With drop-down list:
| Linear connection |
the connection is a line, which only ensures positional continuity with the curves to be joined at the connection points. |
| Extended curve |
the connection has tangency continuity with the curves to be joined at the connection points. |
|
Note on associations
When making associations between free-end points you should avoid creating a segment which crosses existing trim edges. This can cause invalid trim regions to be created. |
Point markers can help you
Note that a circular marker will be displayed at each free endpoint pair within the required proximity tolerance, so that the two points will be joined.
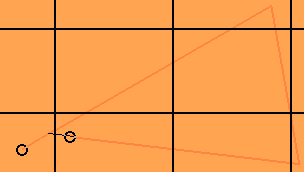
On the contrary, if the points are outside the tolerance limits, and they will not be joined, a cross marker will be displayed on them.
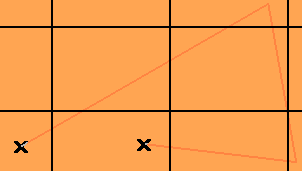 |
Advanced Options
The following options are ignored if you are using the Manual Repair options.
| Parallelism Tolerance |
One of the typical types of problems in trimming is where there are overlapping segments. In this case the program has to determine if they are really overlapping or the free-end points are just close to the other segment. One of the parameters the program uses is a test for parallelism and this tolerance is used as the limit of what the program considers to be parallel segments. Over the span of the overlapping regions, the tangents of both segments must be within the Proximity Radius and the parallelism tolerance as well. |
| Parameter Domain (%) |
This tolerance represents the maximum step that can be taken to close the gap on the surface. It is given as a percentage of the parameter domain, when the chosen Mode is Automatic.
This parameter is used to help the program manage the range of space tolerances for a variety of surface sizes. For example if we have the door panel of a car and a surface defining the molding on the door, they have very different sizes. In one case you might be happy closing a gap of 0.1mm automatically on the door, but this 0.1mm might step completely across a feature on the molding. Another example is a closed surface that could have a gap at the close edge of the surfaces. In this case we could be associating 2 points that are "close" in the range but are on opposite sides of the surface from each other. |
| Reset |
Enables you to reset the values back to the ones considered to be normal values. It is only active once either of these Advanced Options is changed. |


