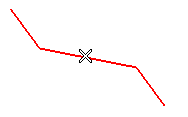
| About the profile The profile to be selected must:
|
To change the selected profile, right-click on Profile, choose Reset in the context menu and select another profile.
| Note Initially the default thickness value is inherited from the Thickness: parameter in the Bend page inside Sheet Metal category of the Entity Properties. You need to modify it as per requirement. |
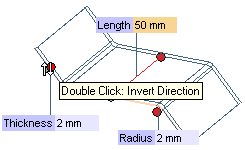
To invert the direction of the applied thickness, double-click the red handle. To apply thickness symmetrically about the profile, double-click the green handle. (see also Symmetry and Invert Direction handles)
| Note You can also create a solid flange by directly using data from the Bend Table. |
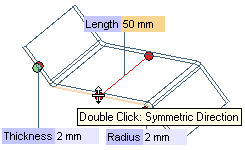
To invert the direction of the applied length, double-click the red handle. To apply length symmetrically about the profile, double-click the green handle. (see also Symmetry and Invert Direction handles)
 or
or  to confirm your selections and create the flange.
Click
 to discard your changes.
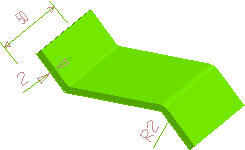
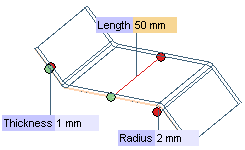
You can directly change these driving dimensions to parametrically modify the form of the solid flange.