Creating a Spined Twist Surface
In this tutorial you will apply a basic spined twist to a surface. Open the Spined_Twist.e3 file available in the Samples folder of your think3 installation and follow the steps given below.
- Start the GSM Spined Twist command and select all the surfaces of the model for the Surfaces to Be Sectioned selector. The selected surfaces will define the drive curves.
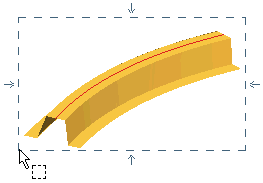
Ensure that the Include surfaces to be sectioned check box under Entities to Be Modified node is selected. This will ensure that the twist is applied to all the selected surfaces.
- Select the curve on the top surface of the model for the Spine Curve selector. The twist will be generated about the selected curve and it will form the reference to place the section planes.
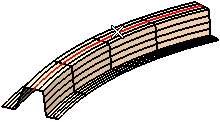
- Expand the More Options node and select Advanced Options; the Advanced Options dialog box is displayed. Enter 4 in the No. of sections edit box and select the Show preview check box. Accept the remaining default values and finally select the Update Now button. Select Yes for the displayed warning to proceed.
- Five section planes will be displayed on the spine curve, dividing it into four sections, as entered in the Advanced Options dialog box. The first and the last section planes are the drive sections.
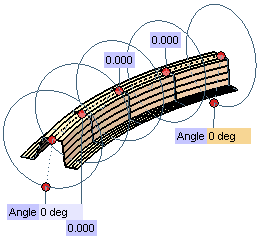
The Angle handle at each drive section enables you to dynamically modify the angle values specified there; also, you see the angle values at each section. As you drag the handle, a dynamic preview of the twisted shape will be displayed, enabling you to control the operation. Instead of using handles, you can also enter the value of the twisting angle in the corresponding Angle edit box.
- Modify the angle values to 15 and -10 at the extreme end sections. The program immediately calculates and displays the angle values along with the modified preview of section curves, at each section plane.
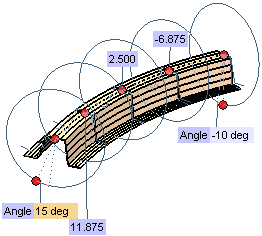
- Clear the Hide and Copy check boxes under More Options and Apply (
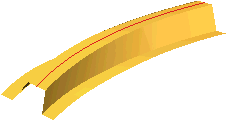
 ) the command. The twisted surface will be developed as shown below.
Also try to ...
Create a Spined Twist Surface (Advanced)


 ) the command. The twisted surface will be developed as shown below.