Creating Radial Axes and Circular Centerlines
In this task you will use the Centerlines command to create radial axes and circular centerlines for patterned holes. To follow this step-by-step example, load the Angular_Pattern.e2 drawing available in the samples folder of your product installation.
Before you start ensure that the drawing view is set as current. To do so, double-click on the available view.
- Start the Centerlines command and set the Mode to Axes on circular pattern. Now, the selection list updates to show Pattern Center selector.
- Select the Show radial axes and
Show circular centerline check boxes.
| The application always restores the last mode of axis creation so that once the user starts the command, it will use the last mode of axis creation.
|
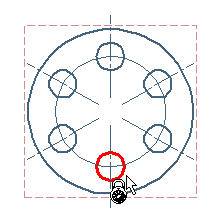
- Specify the center of the pattern for Pattern Center selector. The selector updates itself to Hole indicating to choose, any, one hole of the pattern.
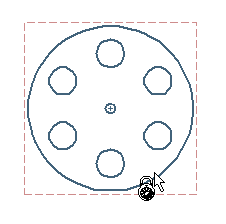
- Now, choose a hole.
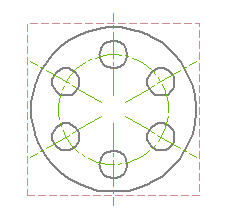
You can see the radial axes and the circular centerlines created for the selected hole as shown in the image below.