
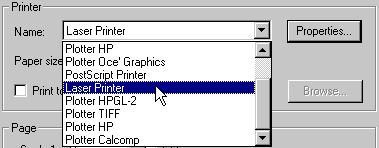
(All names mentioned above and in the following document are trademarks used for identification purposes only.)The corresponding devices are displayed in the Name box of the Printer tab in the Print Setup dialog box, once you have selected the Print mode.
You can edit the existing ".ini" files to change them as you need; you can also create your own ".ini" files (provided you call them "plot_....ini" in the "printers" subfolder). Most of the fields of the ".ini" files are displayed in the Print Setup dialog box opened by theUse Gbplo=0 Name=BGL Plotter Comment= Type=Oce' Graphics G1964 Disp=BGL Where=LPT1: Resolution= HWMargin=15,15 Formats 'A4 (29.7 x 21.0 cm)' '297,210' 'A3 (42.0 x 29.7 cm)' '420,297' 'A2 (59.4 x 42.0 cm)' '594,420' 'A1 (84.1 x 59.4 cm)' '841,594' 'A0 (118.9 x 84.1 cm)' '1189,841' endformats Area SPECIAL endarea Area HIDE endarea
 (Properties) button in the Printer tab, when you choose the Print option.
Below, you will find a description of the fields of the ".ini" files and of how to edit them.
When your changes are applied
Please note that if you edit a ".ini" file while you have a think3 application session running, any changes you made will be reflected to the Print Setup dialog box only the next time you start the think3 application. In other words, you have to stop it and restart it to see your changes.
| Use Gbplo=0|1 | This instruction controls the way printing is performed:
|
||||
| Name=name | The conventional name assigned to the special format. The name typed in this field is displayed as the Name: in the Print Setup dialog box. |
||||
| Comment=comment | Any comment you like. It can be useful when you have defined two similar but not identical special printing devices, in order to distinguish which is which between the two. It is displayed as the Comment: in the Print Setup dialog box. |
||||
| Type=type | Conventional description of the device type. It is displayed as the Type: in the Print Setup dialog box. |
||||
| Where=output device | The name of the output device or of the file to which the plotting is to be directed. It is displayed as Where: in the Print Setup dialog box. |
||||
| Resolution=nnn [dpi] | The printing device resolution. You can express it in the following two different ways:
|
||||
| HWMargin=ho,ve | In some devices, the printing area does not cover the full size of the sheet but is contained inside the sheet: there are some "hardware" margins that can be specified here.
|
| FOrmats 'format description' 'width,height' ... endformats |
This section can be used to define the possible sheet sizes for your special device. You can define one format per line with the following syntax:'format description' 'width,height'where:
|
| Area SPECIAL GBPLO's initialization file directive ... end area |
You can add to this section, one per line, any of GBPLO's initialization file directives appropriate for the specific device. The directives you add to the Area SPECIAL are displayed inside the Special Options frame of the Print Setup dialog box. For example, in the case of the BGL format, you can manage the
printing of large drawings so that the plotter effects printing in
frames. To activate this printing mode, you will have to add the following
directive: Such directives can be used wheteher Gbplo=0 or GBplo=1. For a complete list of the available directives, see GBPLO's initialization file directives. |
| Area HIDE GBPLO's initialization file directive ... end area |
You can add to this section, as well as to the Area SPECIAL section, one per line, any of GBPLO's initialization file directives appropriate for the specific device. The directives you add to the Area HIDEare not displayed in the Print Setup dialog box. Such directives can be used wheteher Gbplo=0 or GBplo=1. |
| 1 | In the "thinkdesign\files\printers" folder, make a copy of one of the ".ini" files. Make sure you make the copy inside the said folder, otherwise the new file won't be recognized as a special printing device file. |
| 2 | Rename the copied file to "plot_string.ini", where string is a string identifying your printing device. Avoid using blanks inside string. Make sure you call the new file "plot_string.ini", otherwise it won't be recognized as a special printing device file. |
| 3 | Using any text editor program — for example, Microsoft® Word Pad — edit the plot_string.ini file |
| 4 | Edit the ".ini" fields adhering to the rules described in "Structure of the initialization files". |