The following terminology is used when describing projection modes:
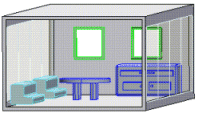
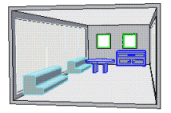
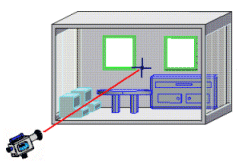
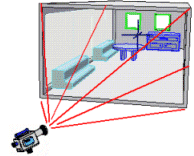
The program constructs bidimensional (on-screen) images of three-dimensional models as either orthographi (axonometric) or perspective projections. The following illustrations show the difference between an isometric view (a form of orthographic view) and a perspective view.
| Isometric | Perspective |
 |
 |
| An orthographic view is created by projecting a band of lines parallel to the view direction, through the boundaries of the model, and onto the projection plane | A perspective view is created by projecting a band of lines, all of which originate at the camera, through the boundaries of the model, and onto the projection plane |
 |
 |
You can display models as either orthogonal or perspective views by selecting the
Orthogonal or
Perspective options.
Alternatively, you can right-click in an empty zone of the Graphics Area and select View Orthogonal Projection or View
 Perspective Projection.