| 1 |
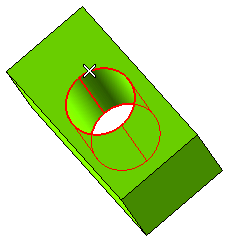
Select the cylindrical face (to change the selected surface, right-click on Surface, choose Reset in the context menu and then select another face).
|
| 2 |
In the Type drop-down list, select Metric Fine Pitch.
Based on the diameter of the selected surface and on the chosen type, the program displays a list of consistent Designations. The application ships with a table containing a set of types and designations (the default.xml and other XML files located in the "files/HoleStdTable" subfolder of the installation folder), which can be edited using the XML EDitor (see also "Customization of Metric Coarse Pitxh Thread Form using XML Editor" and "Customization of the Standard Hole Parameters by using XML Editor"). |
| 3 |
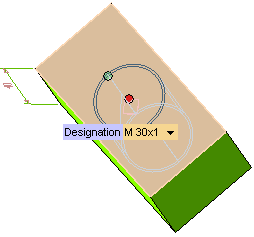
In the Designation drop-down list, select the designation as shown:
 |
| 4 |
In the Mode drop-down list, choose the extension mode:
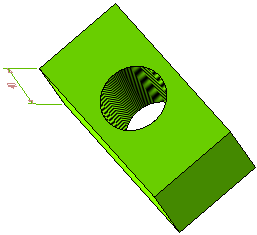
a.Full — The resulting thread extends to the whole selected face.
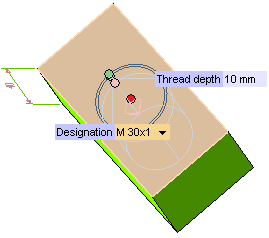
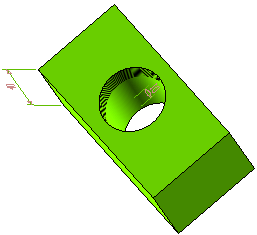
b.Depth — Enter 10 for Thread Depth. Double-clicking on the Depth handle will invert the thread direction.
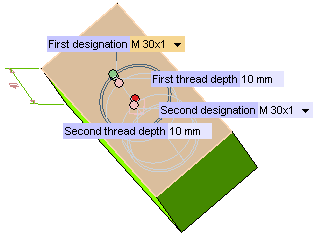
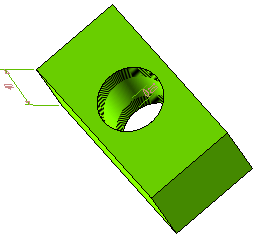
 c.Double — Enter 10 for First thread depth and Second thread depth.
|
| 5 |
In the Hand drop-down list, select the orientation of the thread:
- Right — when viewed axially, it winds in a clockwise and receding direction. This is the default value: a thread is considered to be right-hand unless specifically indicated otherwise.
- Left — when viewed axially, it winds in a counterclockwise and receding direction.
|
| 6 |
Click  or or  to confirm your selections and create the thread.
If you have selected: to confirm your selections and create the thread.
If you have selected:
a., you can view the following thread:
b., you can view the following thread:
c., you can view the following threads:
Click  to discard your changes. to discard your changes. |


 c.Double — Enter 10 for First thread depth and Second thread depth.
 or
or  to confirm your selections and create the thread.
If you have selected:


 to discard your changes.