Note that the section view is aligned with the view from which it is derived, unless the Align to main check box is cleared in the Drawing View category.
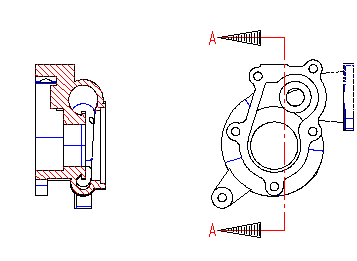
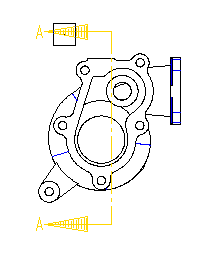
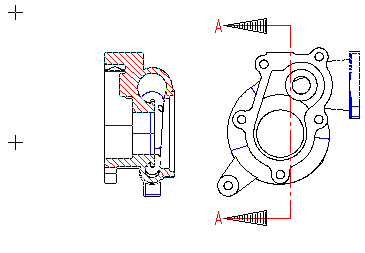
| 1 | When you start the Sectioned View command, you are prompted to select a section. Click to select the section symbol. |
| 2 | The program quickly calculates the view. It then displays a preview image of the view, attached to the cursor. Note that the section view is aligned with the view from which it is derived, unless the Align to main check box is cleared in the Drawing View category. |
| 3 | The program prompts you to enter the view origin. Click to position the view. |
| Note
The scale of the sectioned view always matches that of the view from which it was derived. If you change the scale of the main view, the derived views also change. Other factors which affect the appearance of the view, such as the visibility of crosshatching on the sectioned faces, the visibility of its view name, and the visibility of specific types of entities, are controlled from the various categories under Drawing of the Options/Properties dialog box. After you create a detailed view, you can change many of these properties from the various categories of the Drawing View. |