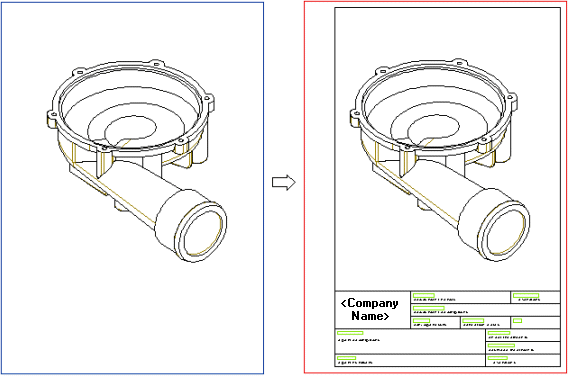
The Drawing Frame and Title Block command enables you to insert a Drawing Frame and a Title Block in your drawing:

| 1 | Start with a drawing of your choice. Before inserting the Drawing Frame and Title Block, we suggest you check the Enable sheet box representation option in the Drawing category of the Document Properties so that you can see a preview of the actions you take in the following steps. | ||||||
| 2 | Start the Drawing Frame and Title Block command. | ||||||
| 3 | Select from the Size drop-down list the suitable size of the Drawing Frame. Normally this is the smallest frame in which the drawing will fit. Note how the bounding box serves a Drawing Frame preview. | ||||||
| 4 | Select from the Orientation drop-down list whether you require a horizontal (Landscape) or vertical (Portrait) frame:
|
||||||
| 5 | If you need to, set the drawing scale by selecting it from the Scale drop-down list or by typing it in the field. Note that you are enabled to enter the scale as 1:2 or 0.5: the two forms are equivalent and the frame is twice as large as the original. | ||||||
| 6 | Select from the Drawing Frame drop-down list the Drawing Frame to insert. Depending on your customization, you may have one or more choices. | ||||||
| 7 | Select from the Title Block drop-down list the Title Block to insert. Depending on your customization, you may have one or more choices. | ||||||
| 8 | Click  to insert the Drawing Frame and Title Block. to insert the Drawing Frame and Title Block. |
||||||
| 9 | If necessary, drag the drawing views inside the Drawing Frame. If you need to change any of the parameters of the Drawing Frame or of the Title Block, restart the Drawing Frame and Title Block command and change what you need. |